A couple of months ago Make Magazine‘s site posted a link to one of their projects – The Panjolele Cake Pan Ukulele. I had been considering buying a ukulele for a while and these steps didn’t seem too intimidating. After looking around I dug up a paper copy of the issue that had this project in it and got to work. This post is a build log to help me remember the project in general, and specific lessons I took away from the project.
Getting Parts
After asking my wife if she ever stumbled across cake pans while going through thrift stores (“not very often”) I decided that I would set a primary goal of finishing this project, and as a concession toward that goal I would just buy the parts I needed, as recommended in the project listing, and not worry about trying to get the cheapest parts. I ended up buying the cake pans from Amazon (8-inch, 9-inch), and strings and tuning pegs from Elderly Instruments as recommended in the project listing.
From the hardware store (non-tools) I purchased an oak 1×2 (48″) and spray polyurethane. The project calls for a 36″ 1×2, but it was much cheaper than I thought so I bought the longer length to either play with in another project, or to cover my butt if I messed up this project. This turned out to be a good idea.
At this point, excluding tools, I haven’t bought or otherwise ensured I had the 2″ pan screw or square toothpicks. I figured the toothpicks could come from anywhere, and I couldn’t actually find a 2″ pan screw of the right size when buying hardware so I deferred it.
I like to use projects to add one or two new and useful tools to my workshop. For this project I purchased a nice reverse-tooth handsaw, a set of very cheap files to see how I liked using them, and a Surform tool. The verdict was that I love the saw and files, wished I had them a long time ago, and want to do more projects than involve shaping wood, which I had never done before. The Surform was worthless. I don’t know if it was the oak, what I was trying to accomplish, or my lack of skill, but the Surform did absolutely nothing useful for me. Later in the project, as explained below, I also bought a new 3/8″ drill bit.
Neck and Headstock
The neck and headstock is the first step of the project and it went smoothly at first. However, after putting and hour or more into I managed to destroy the neck by splitting it while trying to counter-sink the tuners. This was pretty frustrating and probably added a week to my overall project time (in that it took me a week to decide to re-engage).
I decided that the neck split because I use my 3/8″ drill bit for countersinking all the time and it was dull. The combination of a dull bit, the grain in the oak, and the low drill speed as I tried to control the depth of the hole resulted in the split. I ended up purchasing a new 3/8″ bit for my “good” bit set and moved the old one over into my “drill into things you probably shouldn’t” set. Fortunately I had purchased more oak than I needed to I was able to make a second neck without too much of a problem. I also ended up cutting the nut and bridge out of the ruined neck. The second pass at the tuner holes came out much better, though they still weren’t great (see “I really need a small drill press” in the takeaways sections).

Looks pretty good. This was neck number one, I think I was so disgusted at making a second neck that I didn’t take any pictures of it.
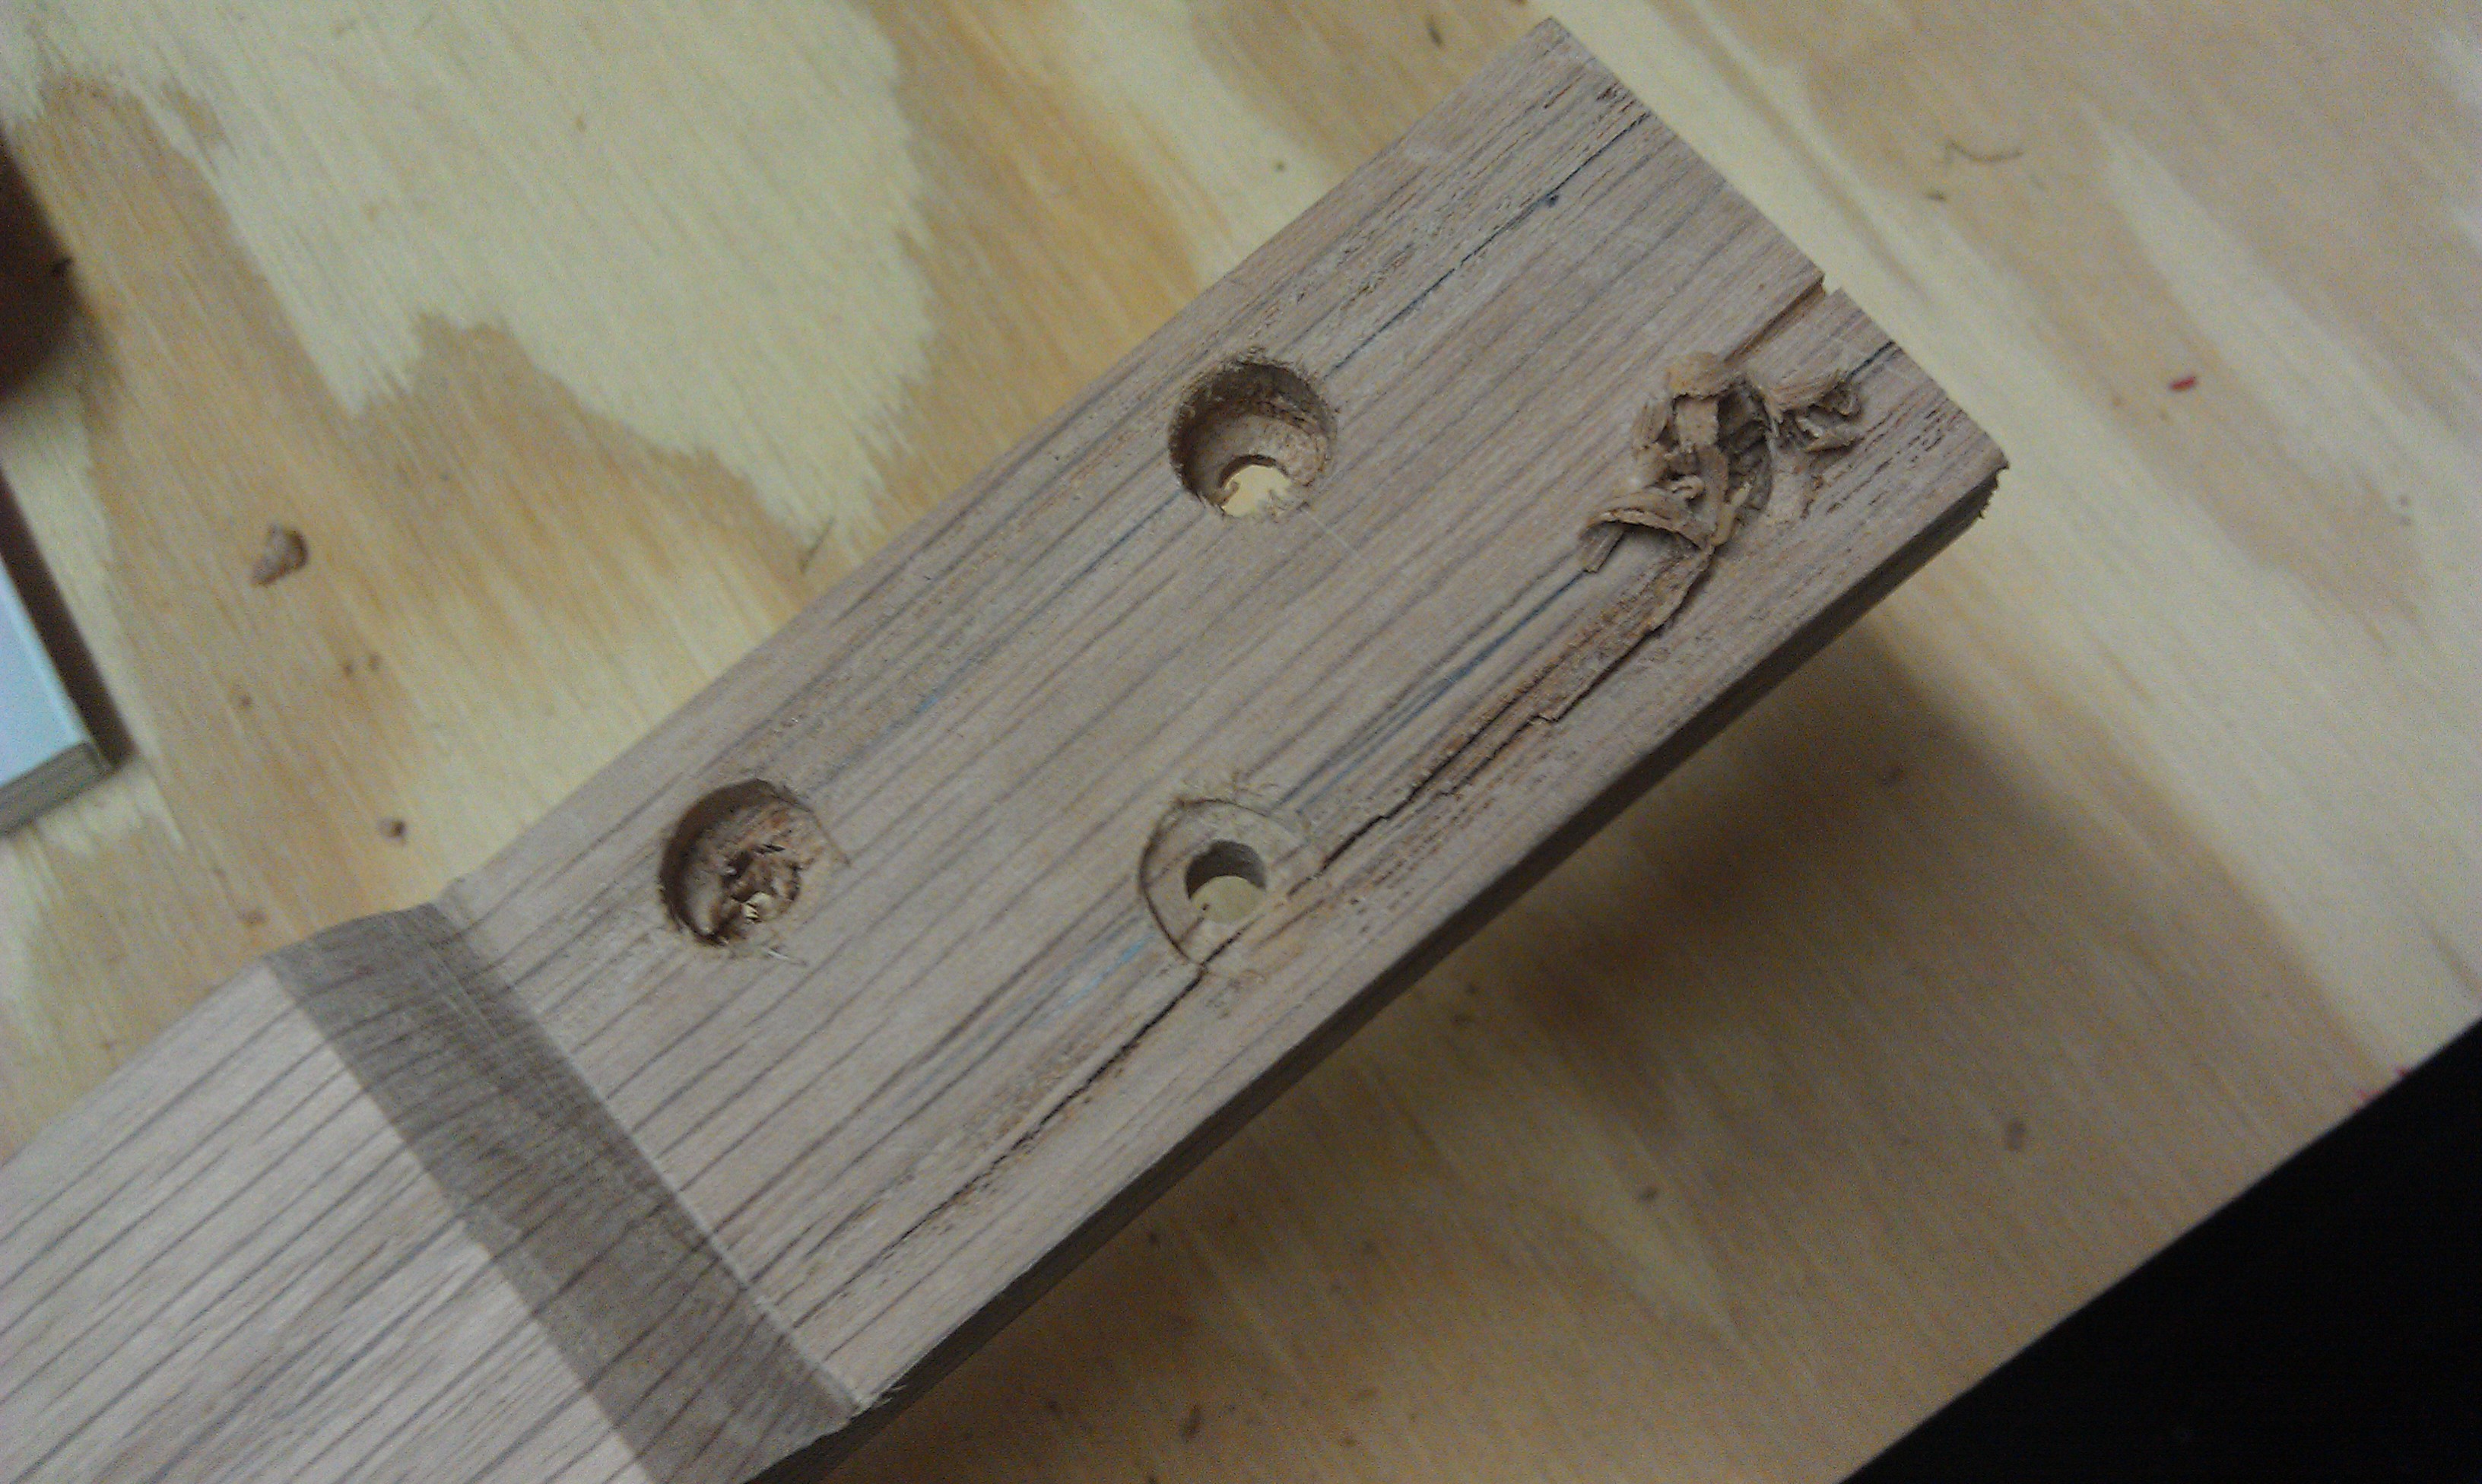
Doesn’t look so good anymore. Crap.
Resonators
The resonators didn’t give me any trouble. I was pleasantly surprised that all of my “find the center” lines agreed, and notching the 8″ pan went fine, I used a combination of hack saw and dremel to do the notching. I remember that both methods had pros and cons, but I don’t really remember what they were. After cutting I brushed, sanded, abraded the cuts to be fairly smooth. In all this was a step I didn’t have a lot of confidence in but the results were really solid.
One note at this step. I ended up leaving the pencil marks on the pans. At the time I didn’t really care and kind of liked the way they looked. Once it was assembled, the marks looked very silly and my ability to remove them were more hindered. The marks are still there, I want them gone, and I’m not really sure what the best method to do it is. (The best I’ve found so far is “lick your finger and rub it really hard”. Not especially fond of that method.)

Yay. Pencil marks. I didn’t get a good picture of just the cutouts, but there’s one in the “Frets” section that’s not bad.
Frets
I assumed I could buy square tooth picks anywhere. Not so much. After having my wife check a couple of places on regular shopping trips, I made a trip to Walmart and found an 88-cent pack of “party toothpicks”, which were all different colors. They were better than any other option I had, so I bought them and used all one color. After sanding, there’s really only a hint of the original color, and I actually like the effect. I will say that if I had known how much trouble the toothpicks were going to be, including standing in line at Walmart with two kids for 15 minutes to spend $0.88, I probably would have tried to find some through Amazon to order with my cake pans.
In terms of actual assembly, this step went smoothly, but was pretty nerve wracking. This is the stage where I started to realize how this project differed from most of my projects. Normally I’m assembling a collection of pieces of wood or other parts in a manner than allows a lot of revision – you can do a lot of dry fitting, you can back the screws out to recut or reset, etc. However, this project was a lot of steps that build on prior work, and any missteps could tank not just the current step but past steps, upping the stakes for getting things right quite a bit. My wife tells me this is a feeling she experiences often with sewing projects, which makes sense.
So, while there was a lot of worry (what if I don’t get the frets space quite right, what if I snap this off when I’m trimming it, what if these aren’t square, etc), the actual work went fairly smoothly. The transition between “toothpicks glued on a board” and “frets on the neck of a musical instrument” was pretty amazing, and things went really smoothly.
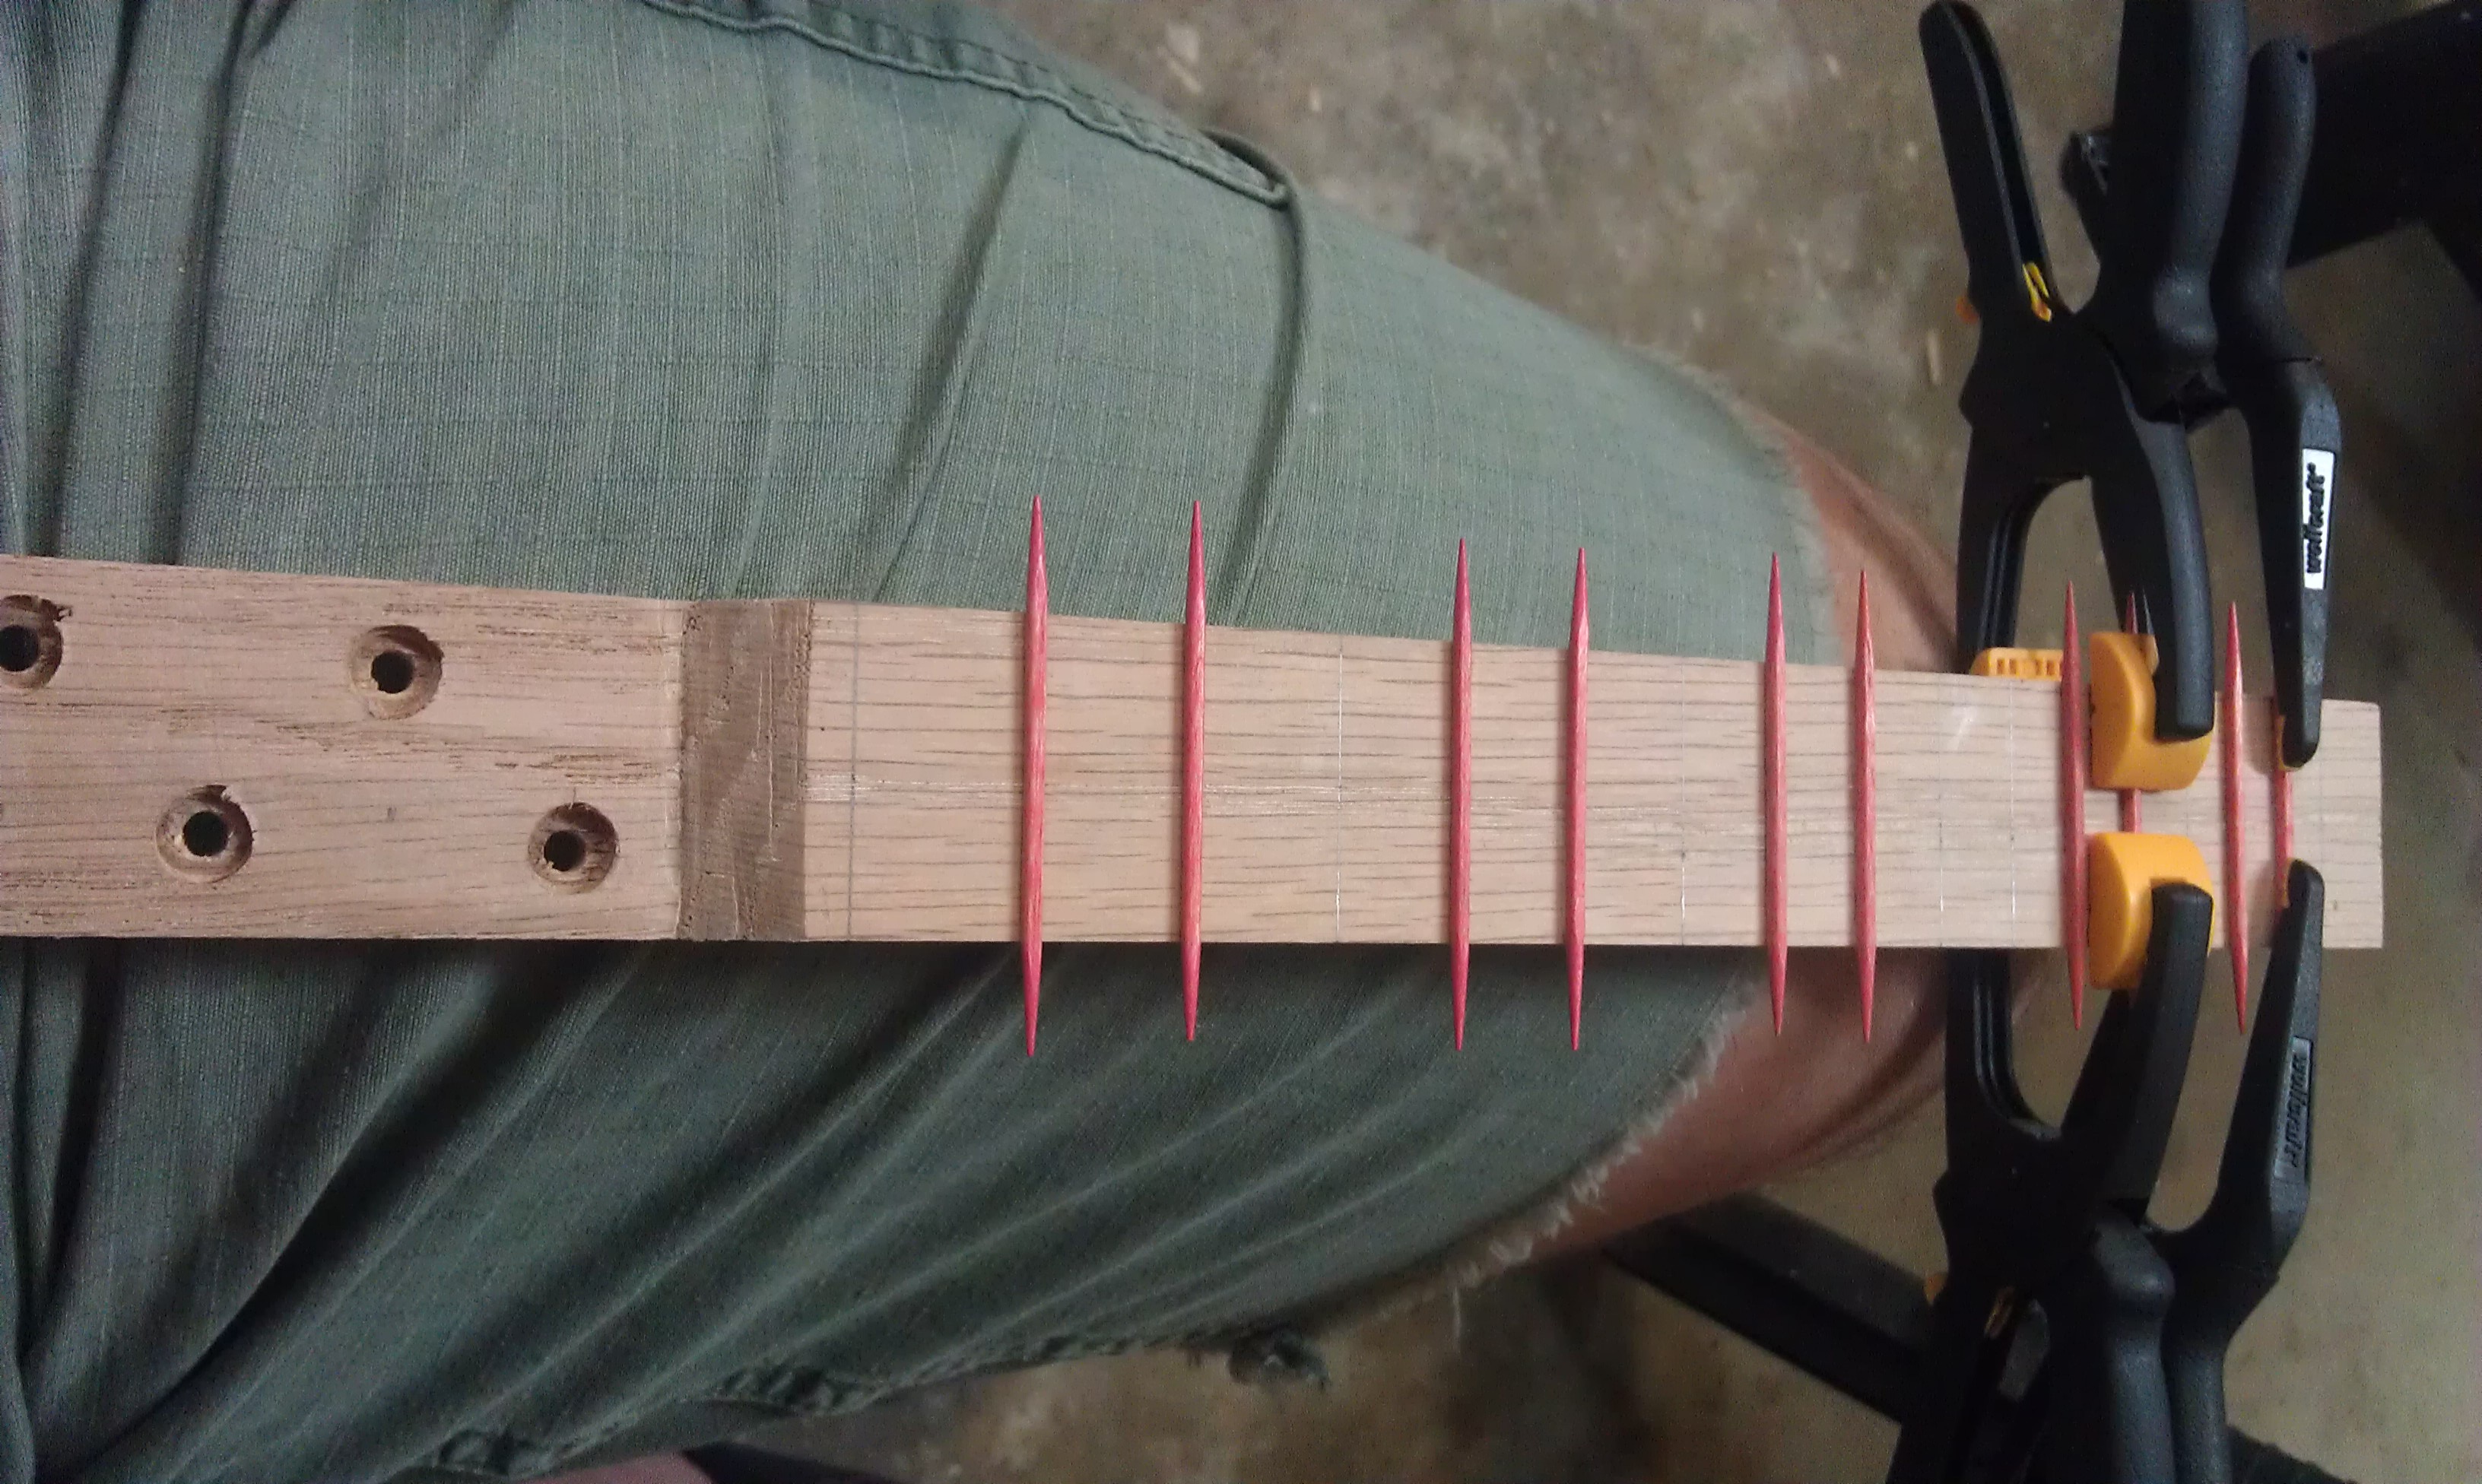
My leg turned out to be the perfect workbench for the gluing step. I was skeptical about how fast the steps suggested you could unclamp the frets, but they were right. After a couple of minutes under the clamp the frets were very sturdy, certainly enough to take light handling as other frets were glued.

Another nail biter – in the end the “lop ’em off and sand it out later” method worked just fine.
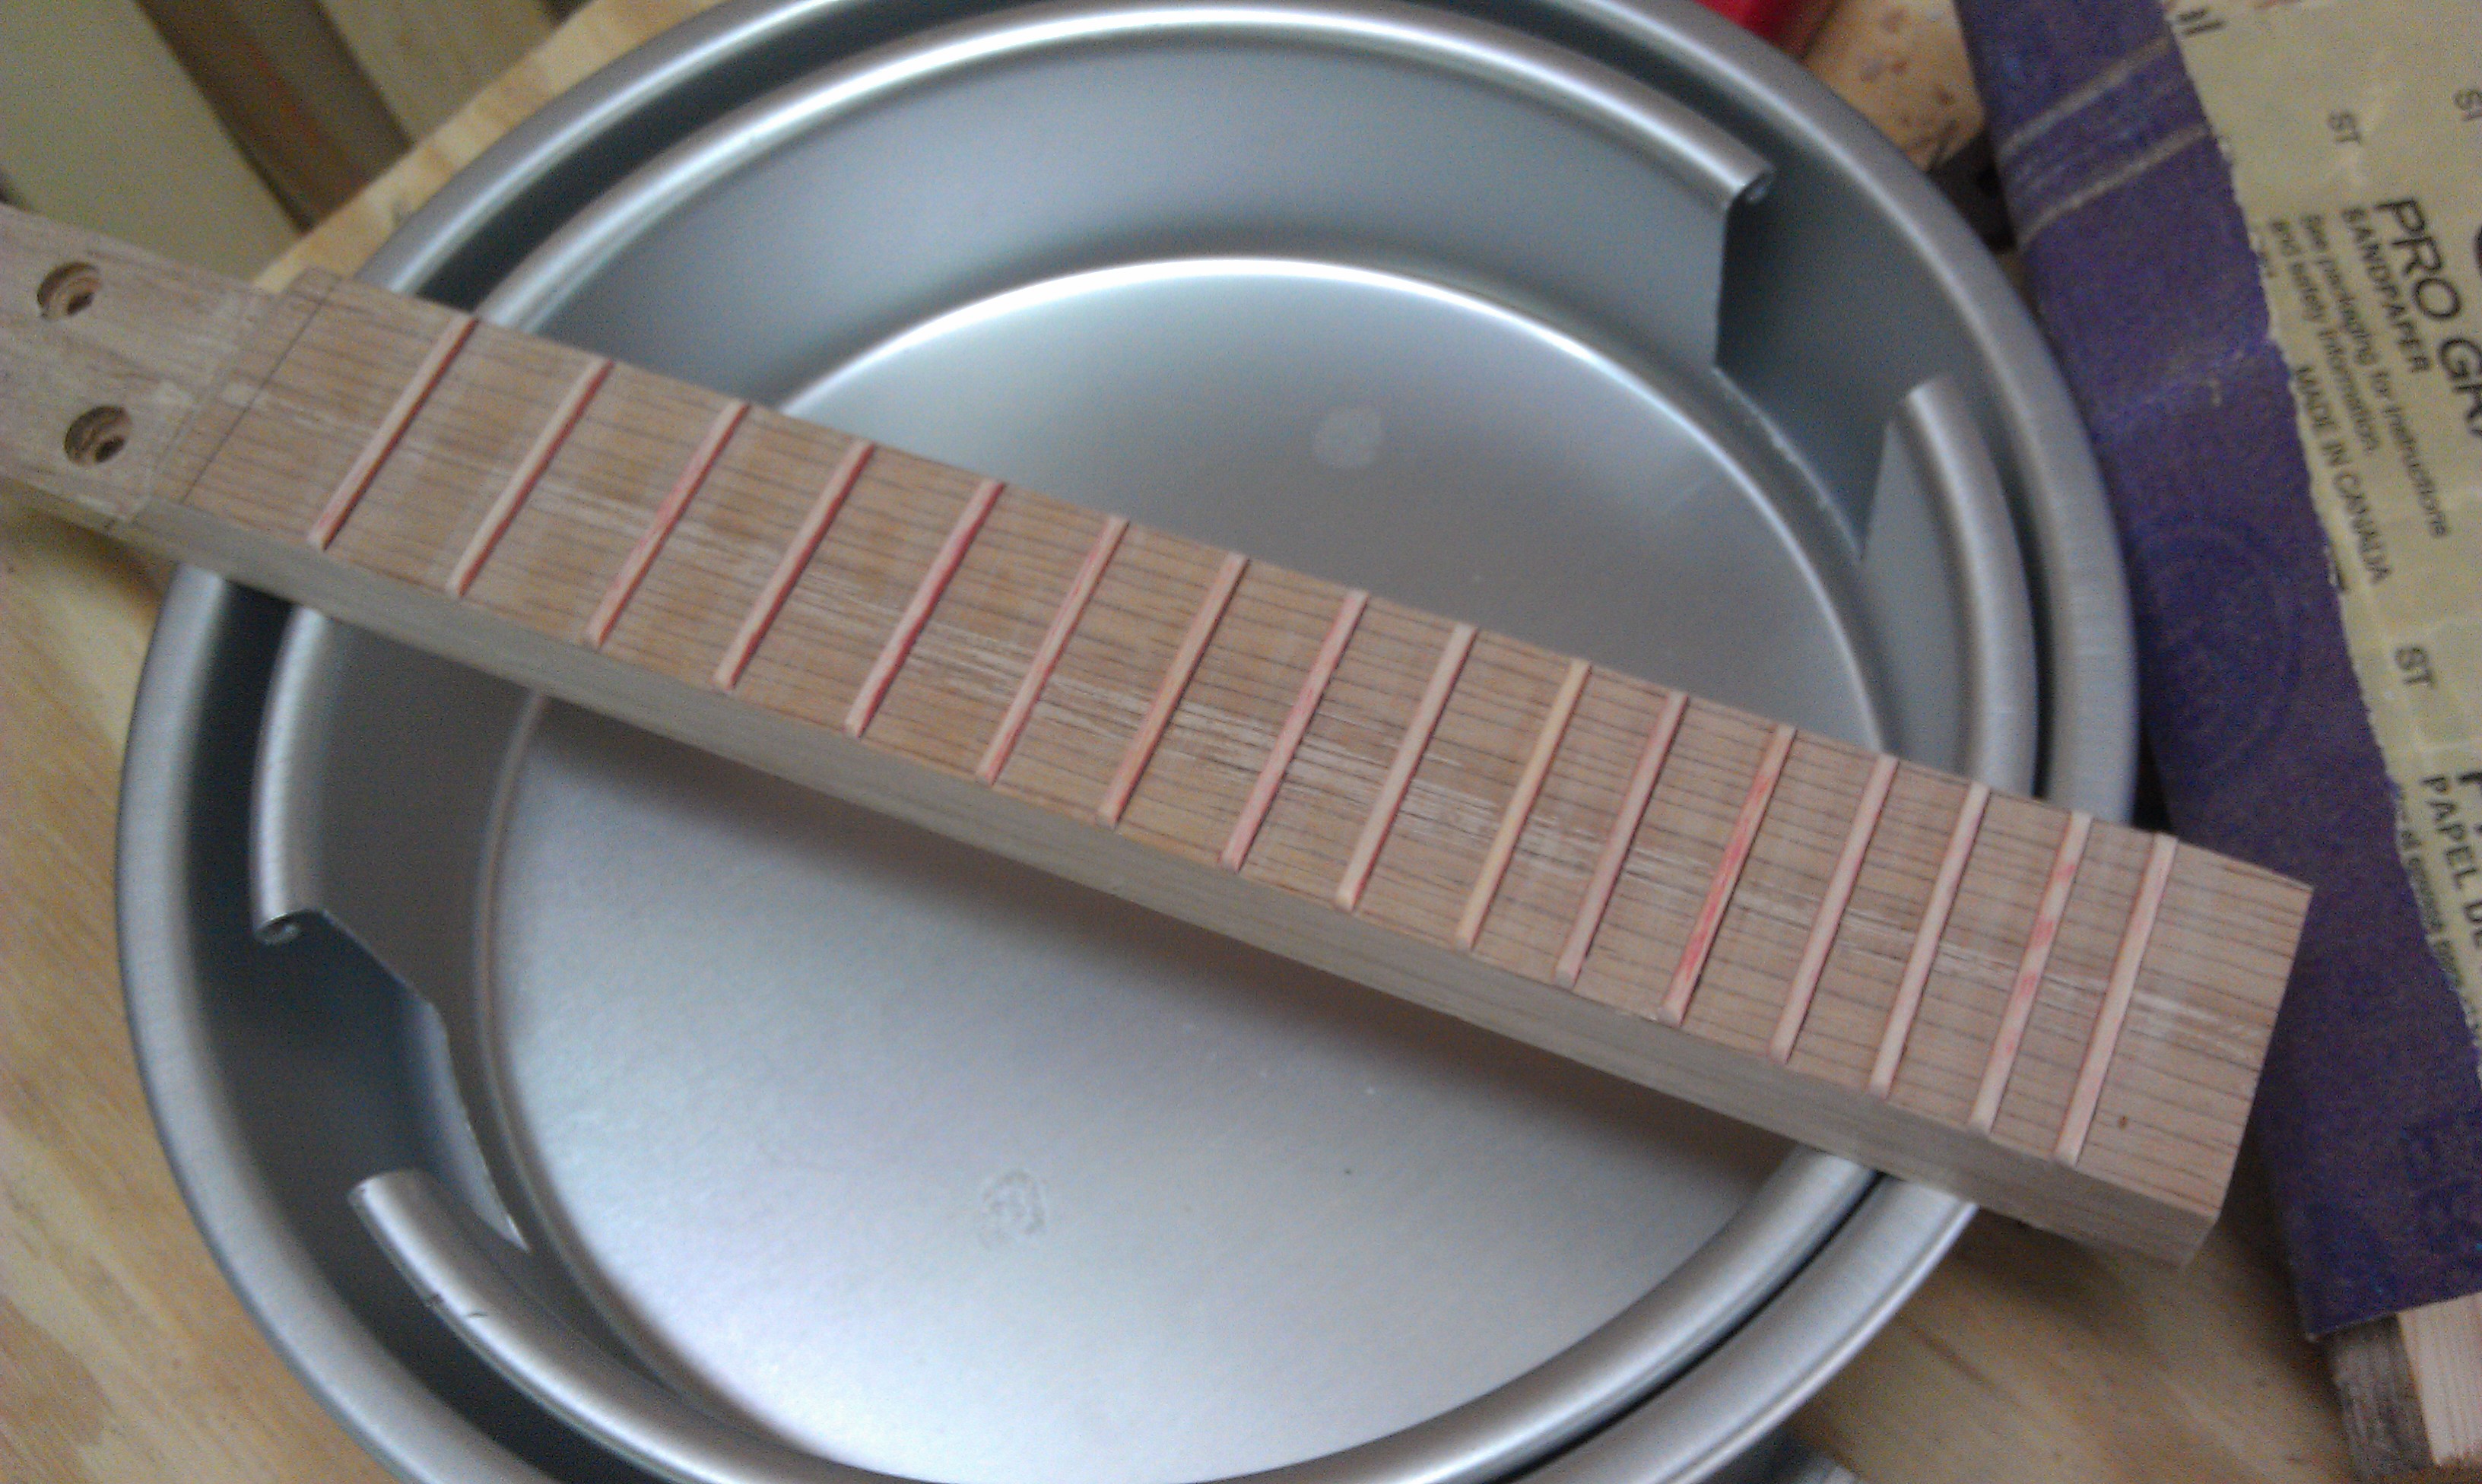
Sanded frets. Not the best picture, but it was pretty amazing to me to see the transition between obvious toothpick and something that looked like a real fret.
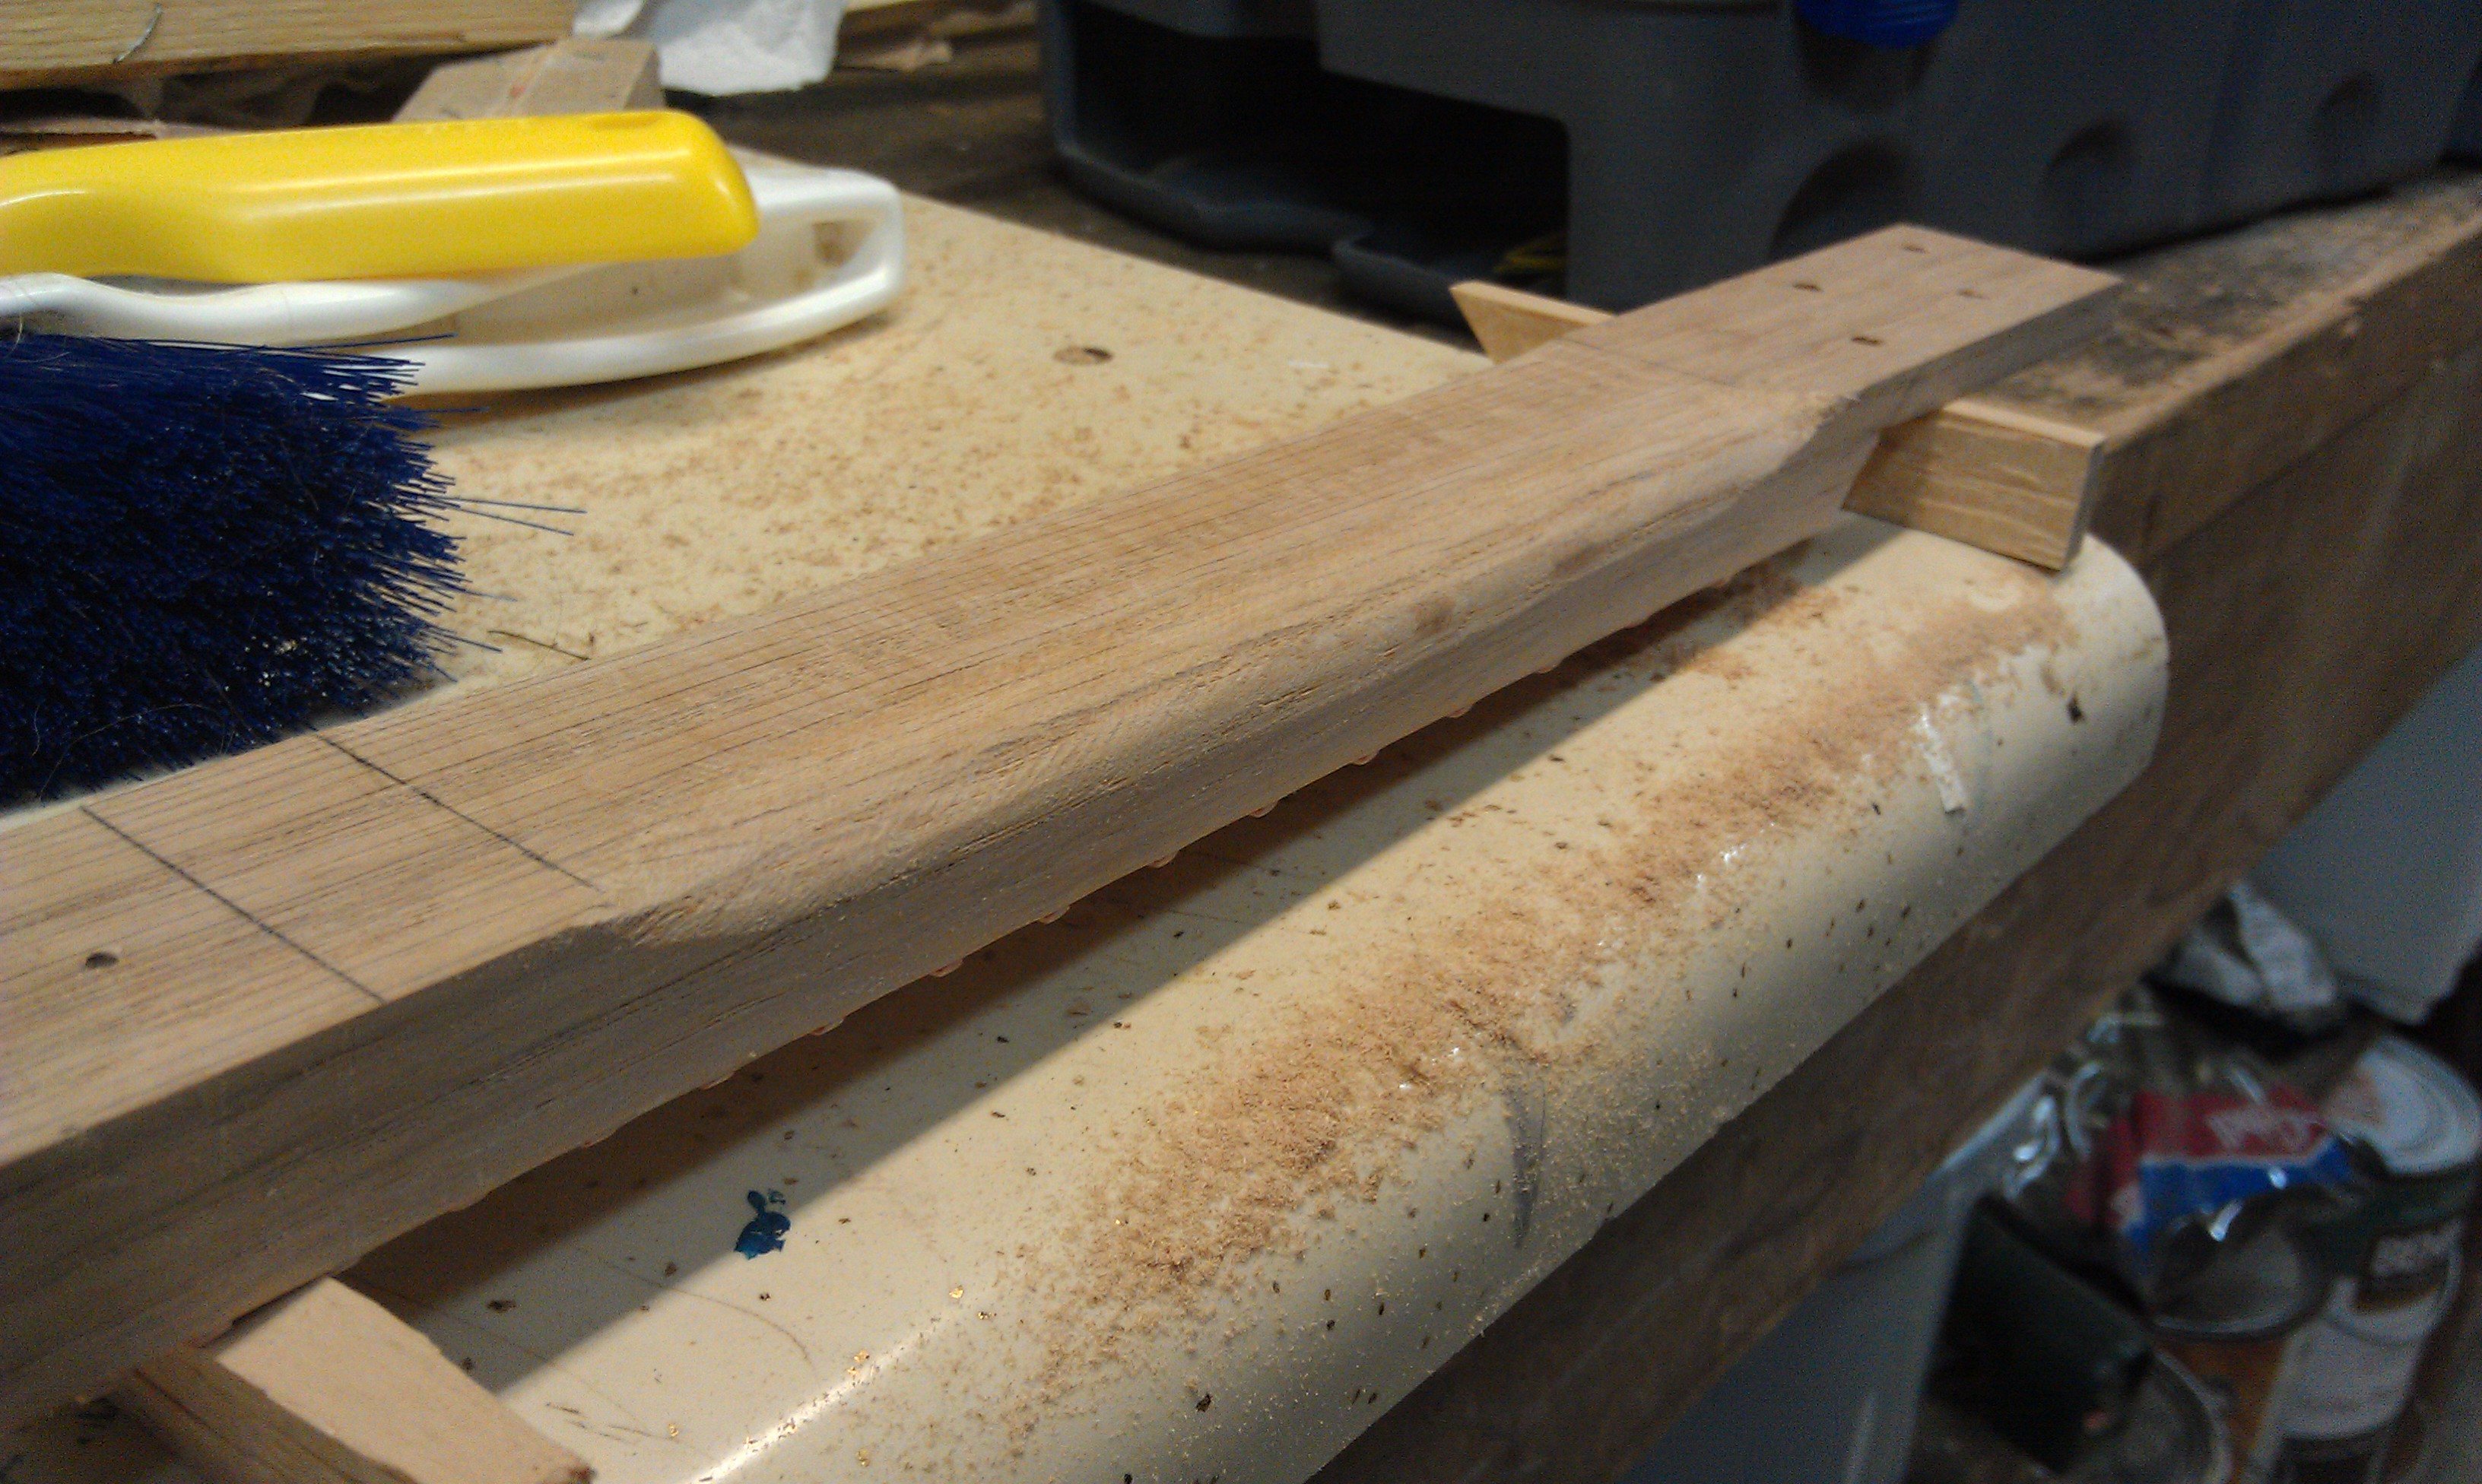
Shaping
I started feeling it with shaping the frets, but I definitely fell in love with shaping wood while working on the neck. It was nerve-wracking taking the rasp to the neck, but it felt great, and the feeling of going from rasp to file to sandpaper was really gratifying. I need (and want) a lot more experience here, but it was a great feeling. When I showed it to my wife her comment was along the lines of “Oh, you can do that now? So many more projects I can ask you to do!”.
As much fun as it was to do, and as happy I am with the results, I should still note that I didn’t remove enough material. When playing the finished instrument, there’s still a very obvious ridge that hits me in the webbing of my thumb that tells my what I did was round the corners, and that I should have spent more effort putting a more crescent-y shape on the back of the neck.
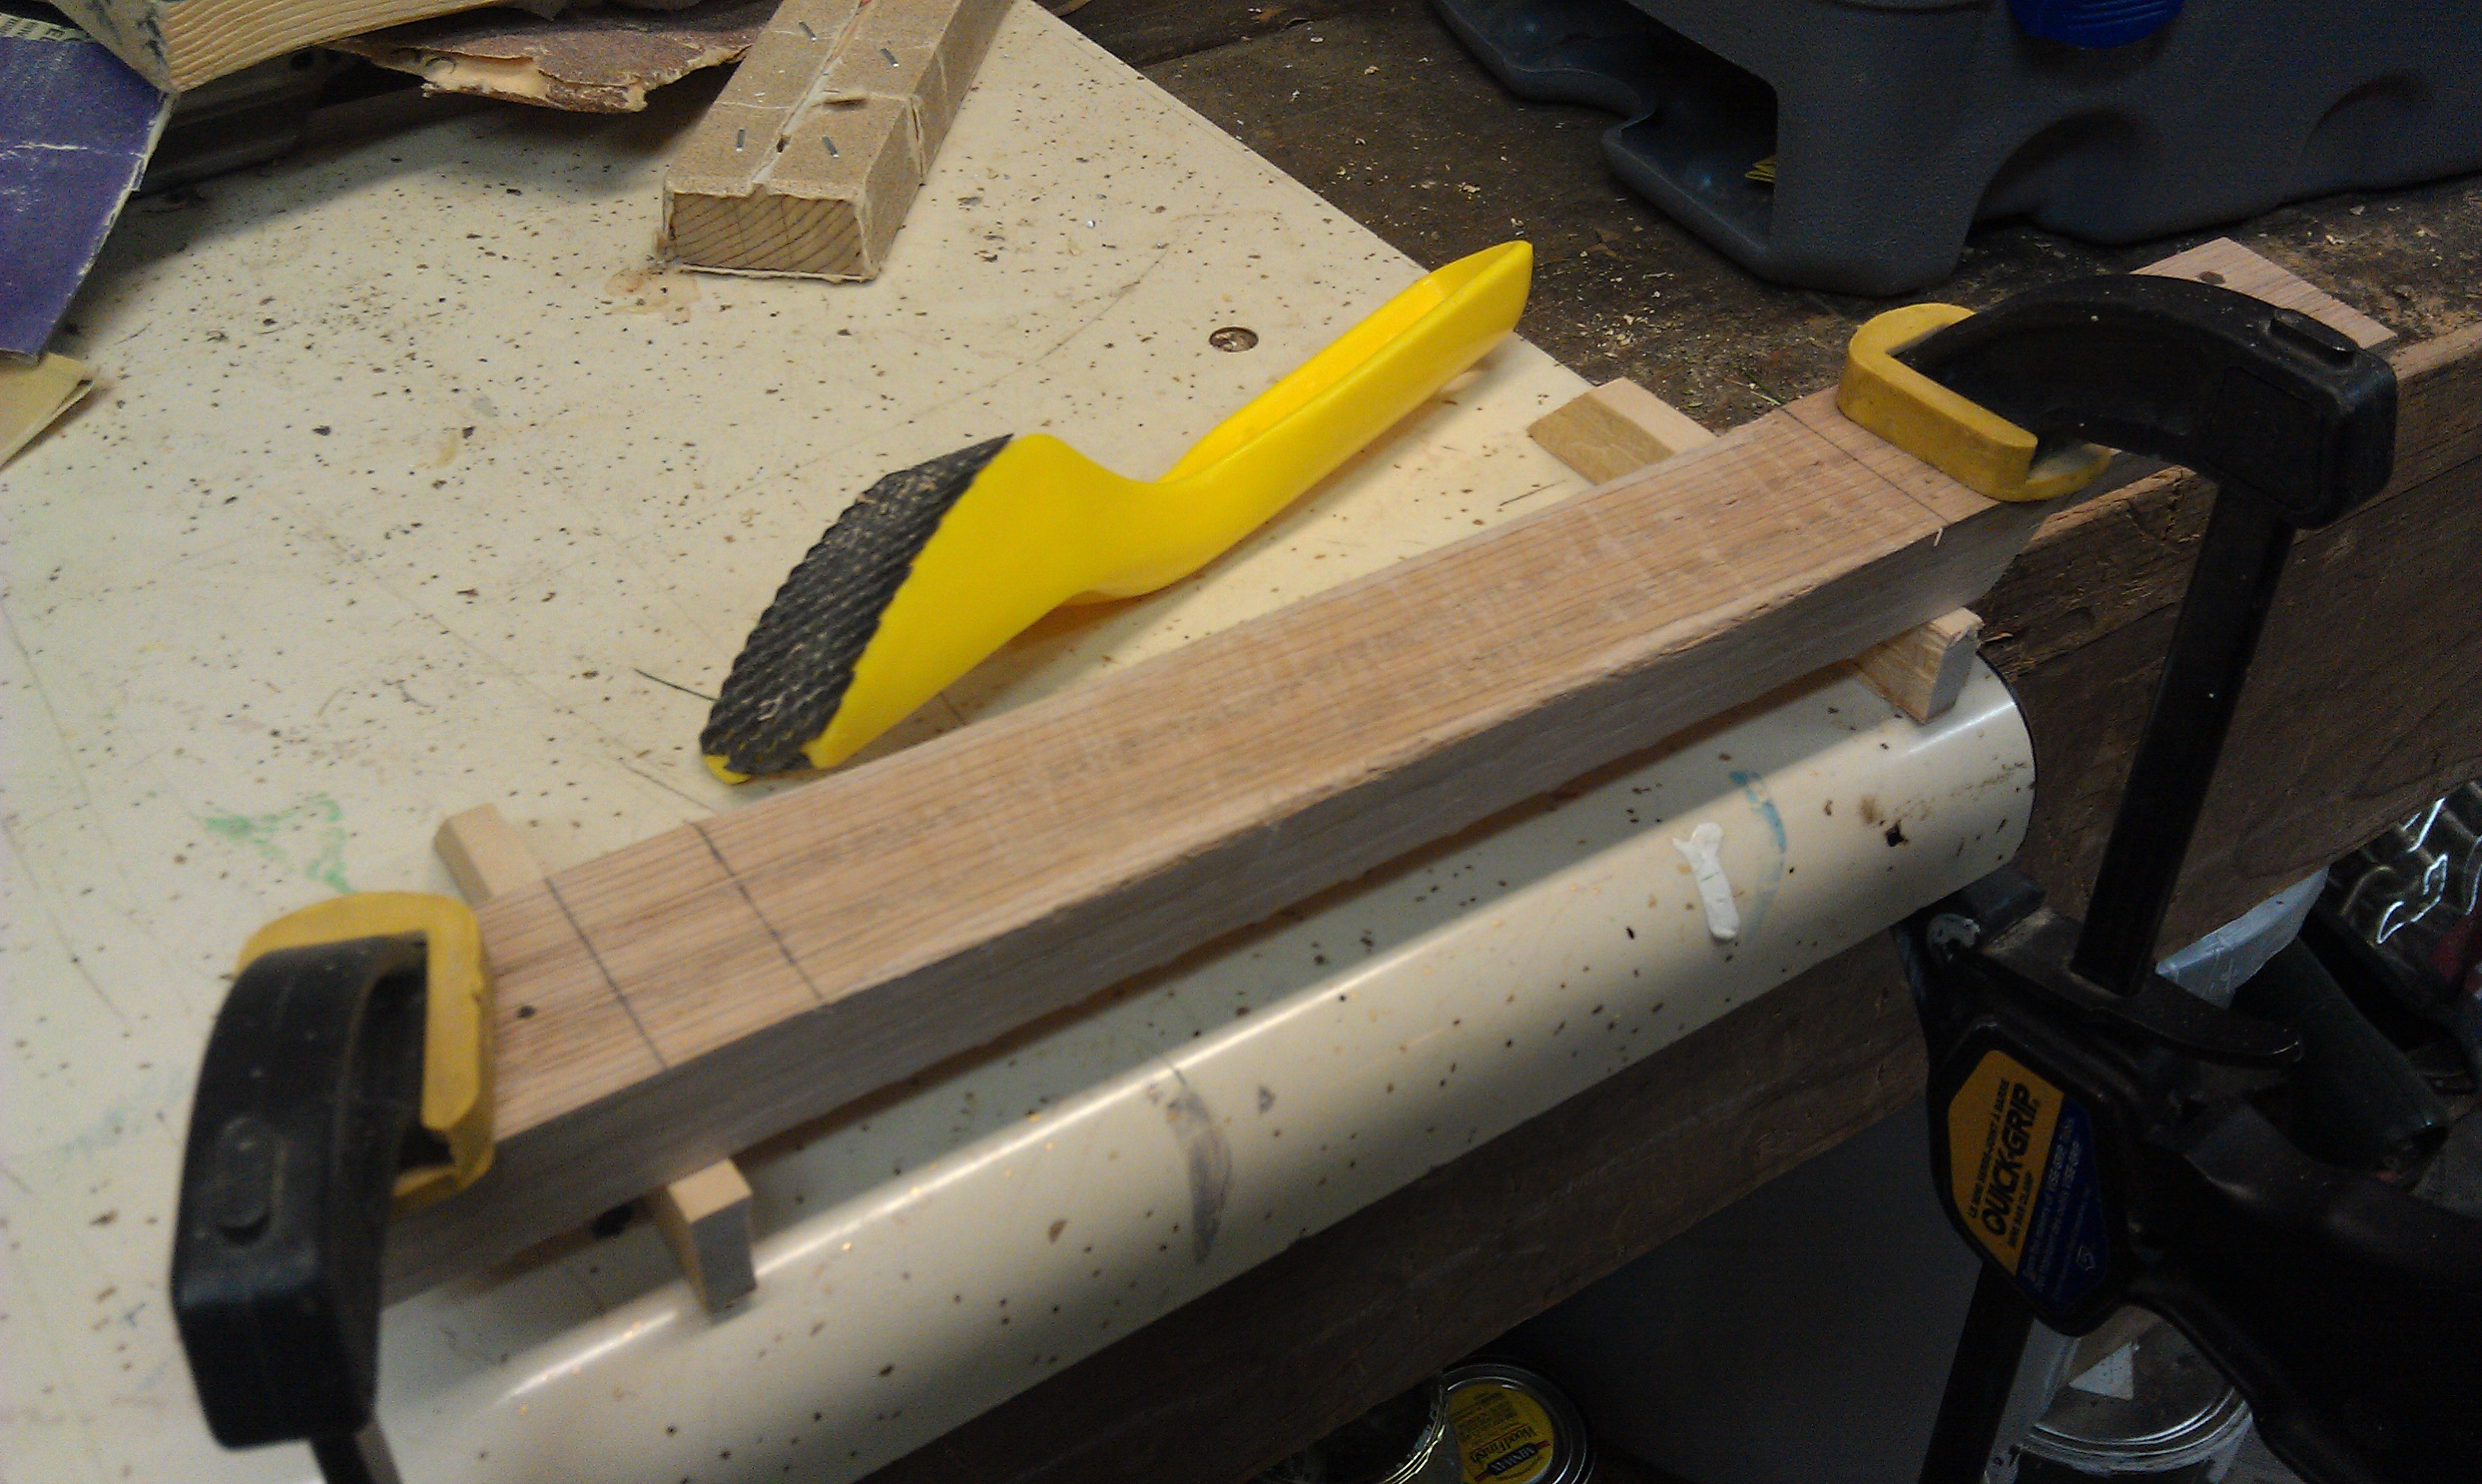
I’m willing to believe it’s not the tool, it’s my use of the tool, but I found that Surform to be worthless. Note the use of the risers under the neck, between the frets – I suspect the frets were put on first so that the neck could lay flat, but they made it really awkward to manhandle the neck the way I wanted to while shaping the back. I think next time I will mark the fret layout, shape the back, and then glue the frets on.
Much better results by giving up on the Surform and going to a rasp and file.
Nut / Bridge
I’m not sure why, but I had a bit of a mental block on cutting the nut and the bridge, to the point where my wife asked if I had given up on the project – I hadn’t, but I was blocked on the best way to accurately cut the pieces. I think maybe I was mentally limiting myself to the tools listed in the project list for some reason. I ended up using a table saw and fence to get small pieces with the appropriate dimensions.
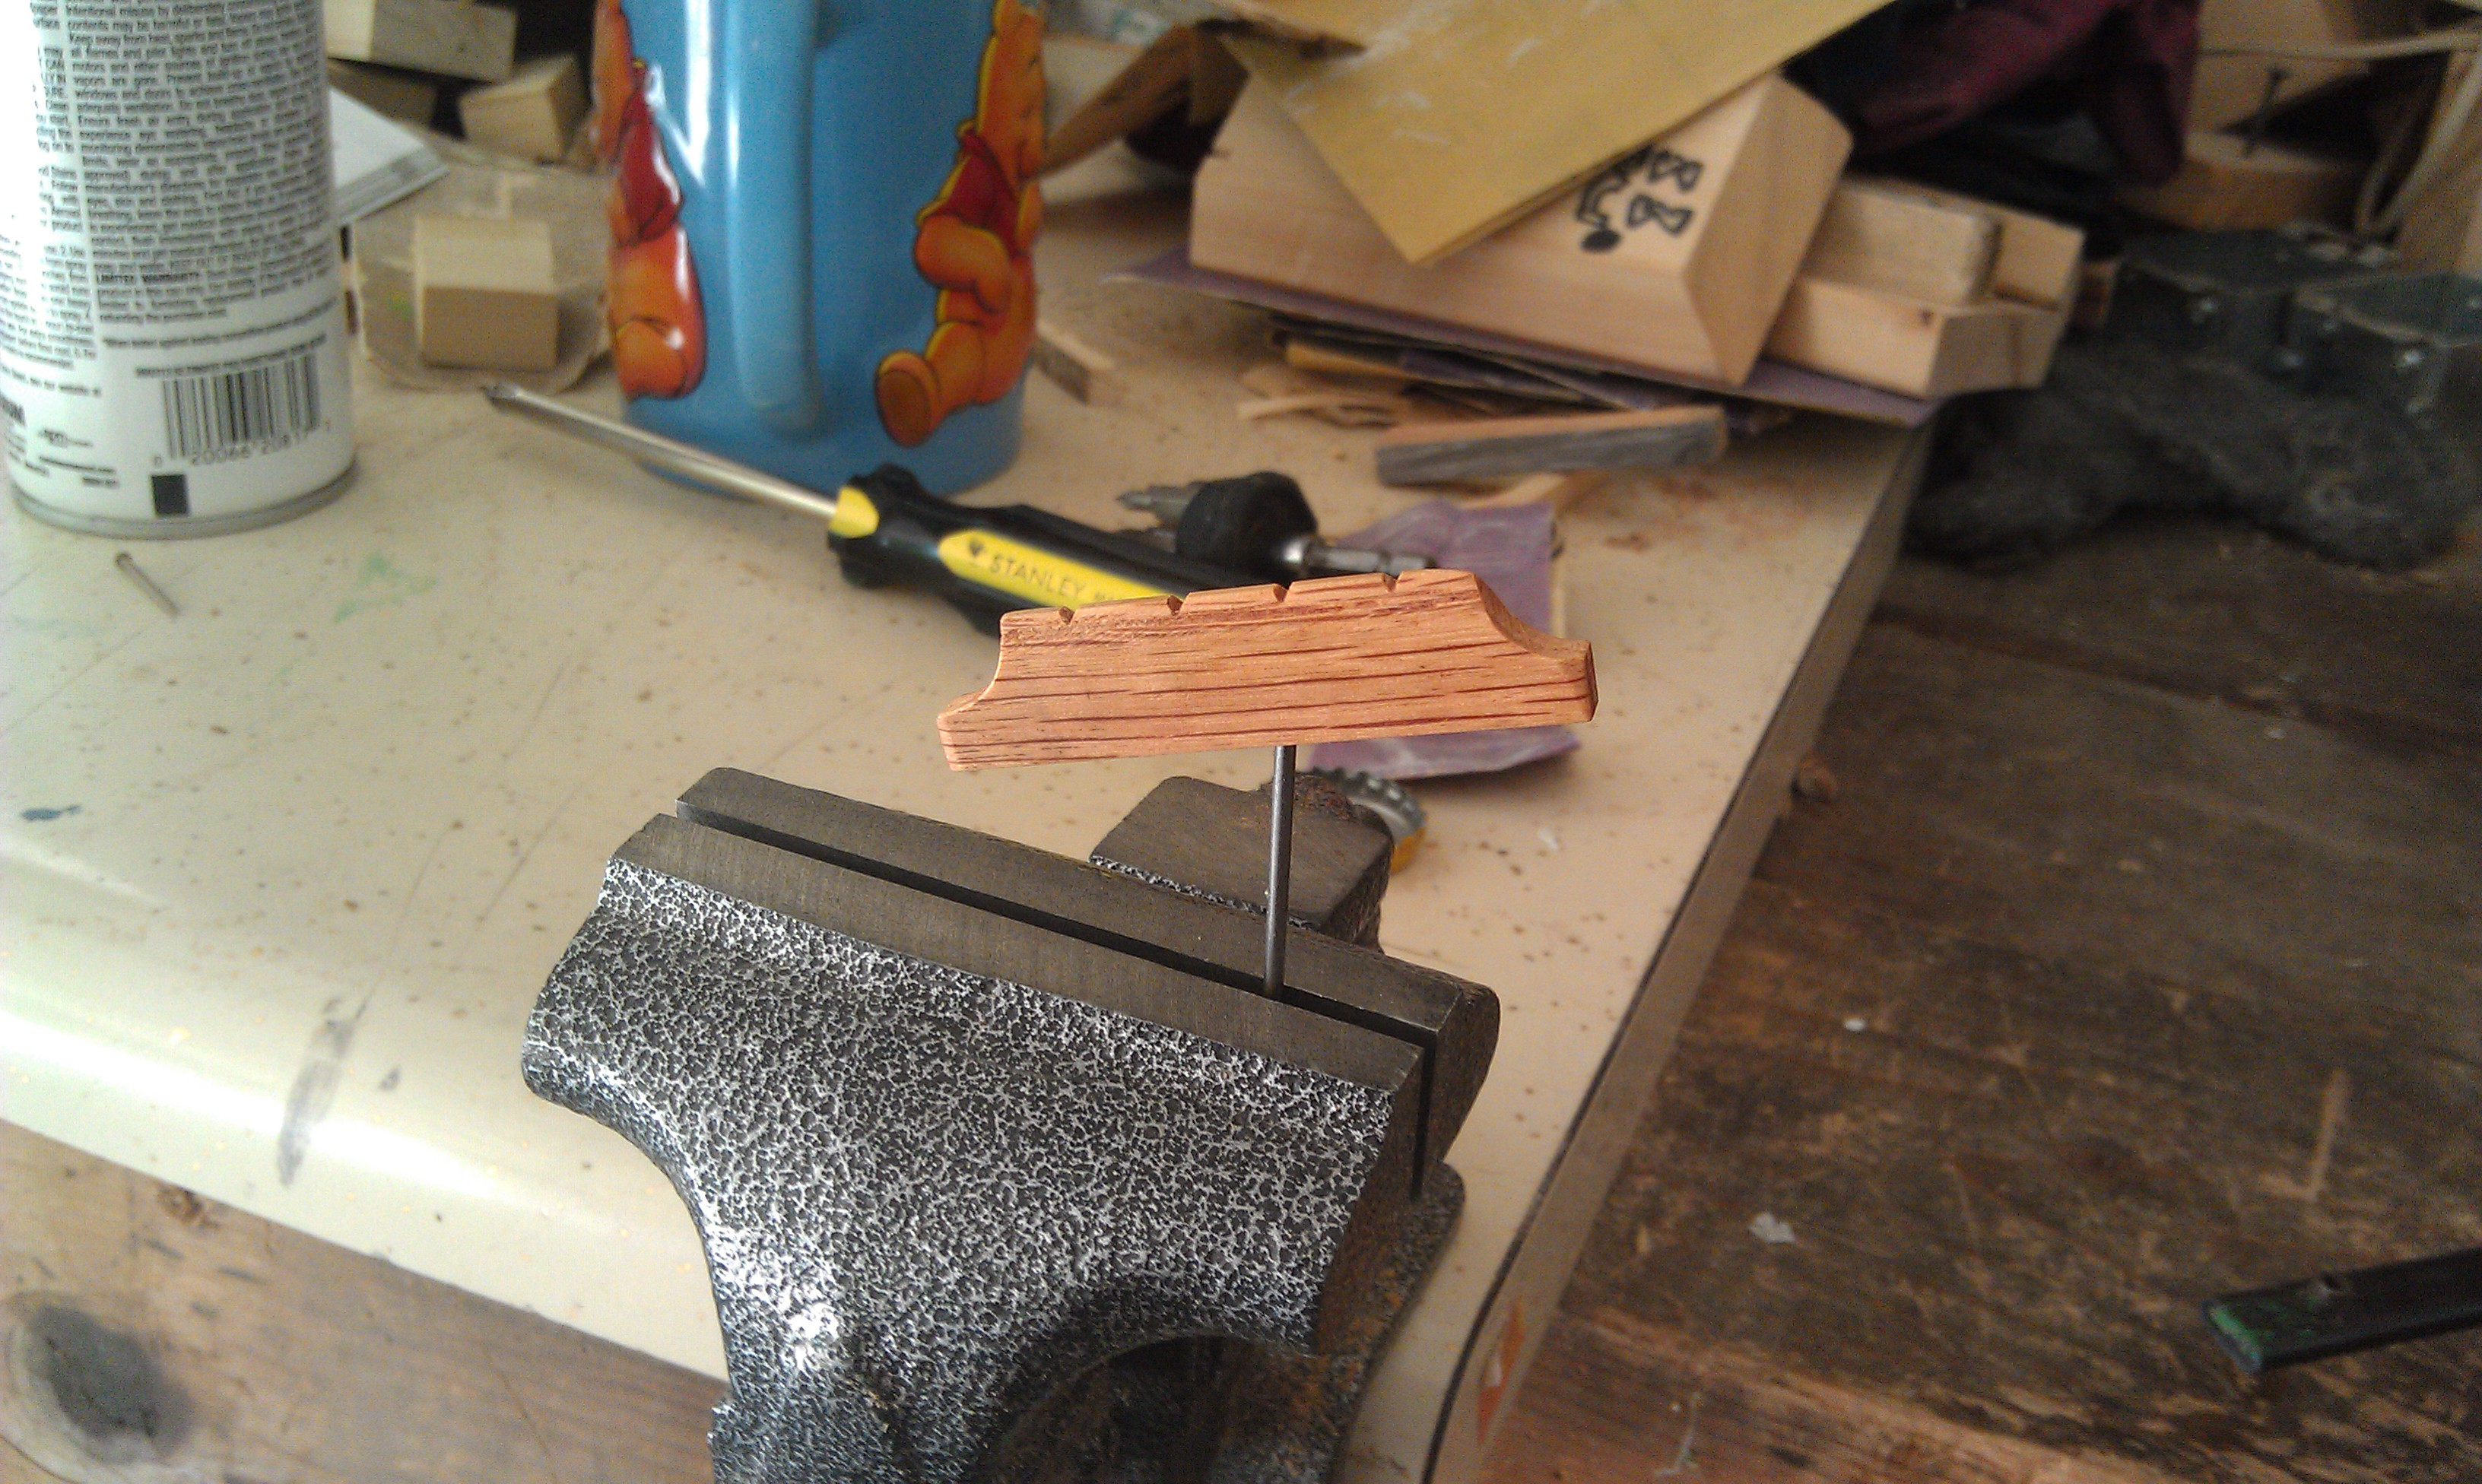
The nut was way too small for me to shape of sand by itself. I ended up gluing it in pretty rough form to the neck, letting it dry, and then shaping it using the rest of the neck as a place to hold it. This method worked fine.
I used a jigsaw (the table kind, not the hand kind) to cut the corners into the bridge, and then I clamped a sanding block to the table to narrow/shape the top. This wasn’t ideal, and I lost a bit of skin and finger nail, but it worked. Right after I finished it, I remembered that I had a small hobby vice that would have worked perfectly to hold the bridge while I sanded it. Oh well.
Finish
I hate applying finish to projects, whether it’s paint or stain. I have to say though that I fell in love with this spray-on polyurethane.
I’m not really in love with oak as a wood, but I wanted a solid hardwood for this and oak seemed like a good choice structurally. I really hated its washed out look though. I’m embarrassed by how shocked I was at good the poly made the wood look. Compare the bridge below, with one coat of poly on it, with the neck above. The neck looks washed out and uninteresting and the bridge looks pretty darn good.
No fuss, no muss on this stage. I gave it several coats over a couple of days and made sure it had plenty of time to dry before moving on.
The finish on this looks great.
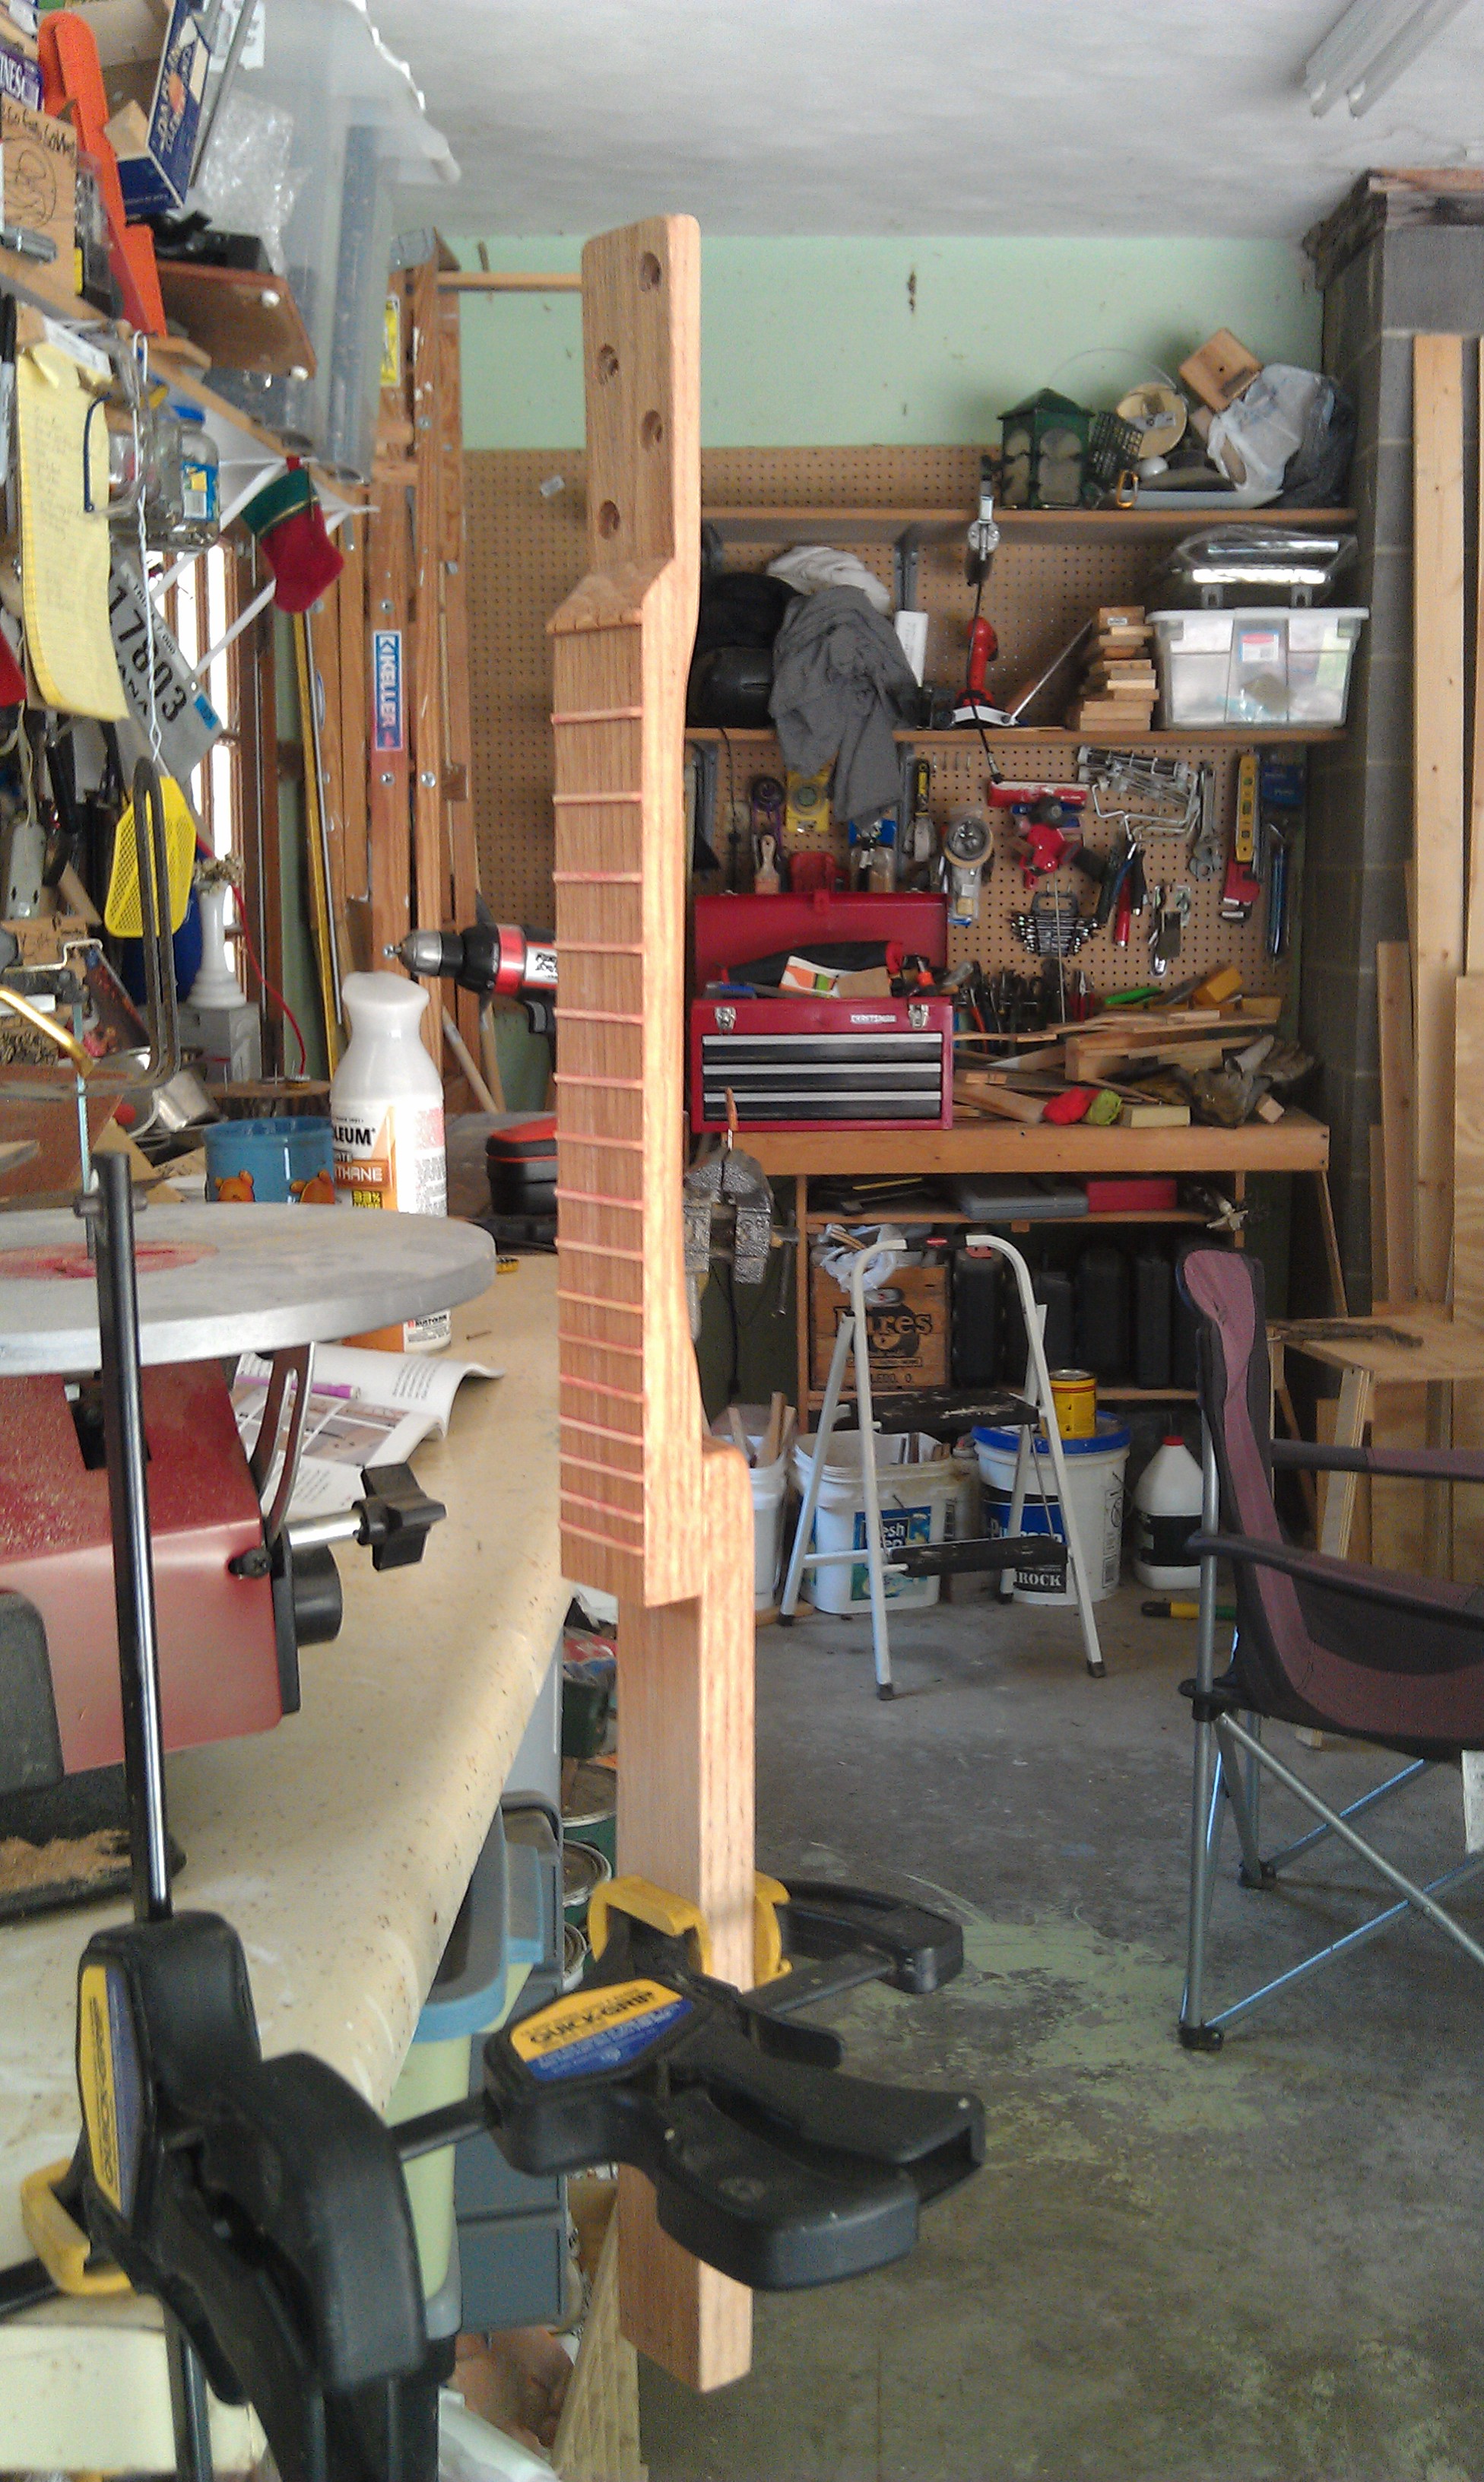
Originally I wasn’t going to coat the part of the brace that’s clamped here at all since it’s completely covered by the pans, but in the end I decided it was for the best to coat the entire thing. This is also the only picture I have of the neck and brace assembled without the pans.
Assembly
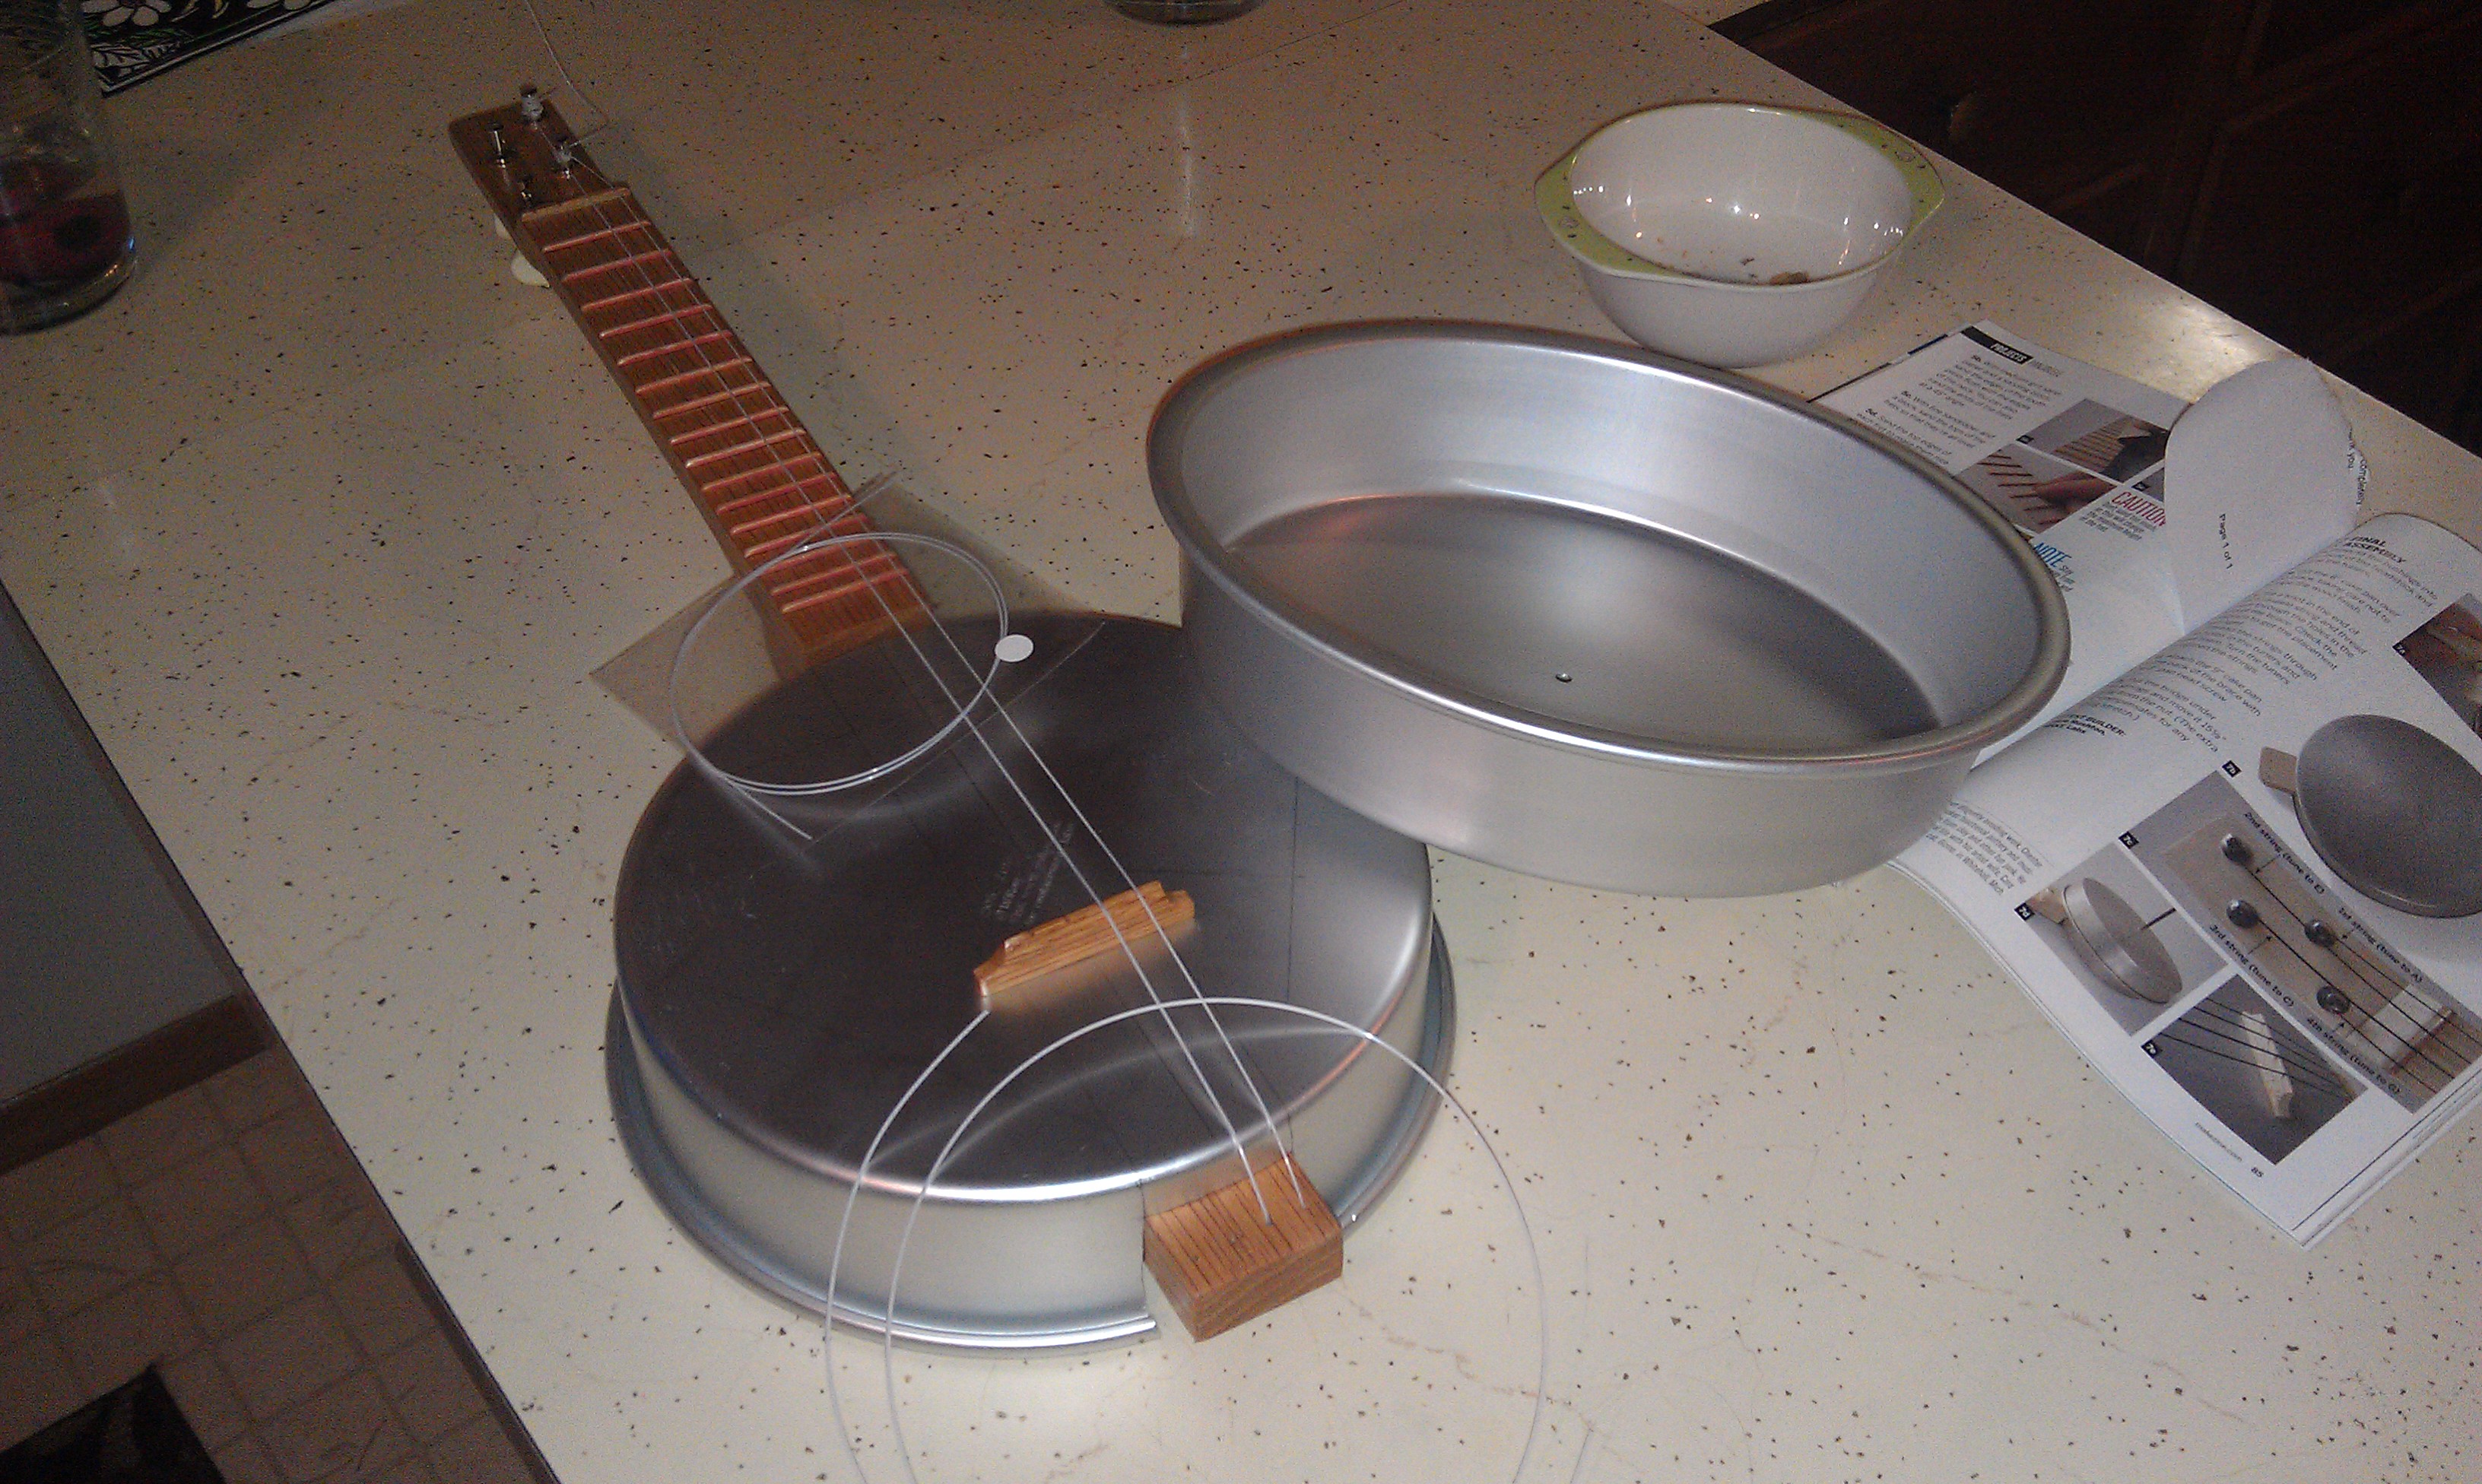
Final assembly went smoothly, but it was one of the less-well documented parts of the project. It had not been clear to me at all that the bridge and the front pan were held on only with tension. That’s not earth shattering or anything, but it was a little awkward trying to rectify the lack of statement about assembly, my incorrect assumptions, and the reality of the shapes of the parts in front of me.
Right about the time I started to put the back pan on, I realized I never did buy that 2″ pan-head screw. Fortunately a quick dive through the ol’ spare-nut/screw jar turned one up that worked fine. However, I think there’s a mistake in the parts list here. If you read Make’s parts list, they call for a 2″-deep cake pan, and a 2″ long, pan-headed sheet metal screw. It’s not cear to me how a 2″ long screw is ever going to secure something that’s 2″ deep to something the pan is resting flat against. In the end I’m happy I didn’t buy anything because it would have been wrong.
The other problem I had at this step is that the rear pan sits right on top of the strings here they pass through the brace piece. I’m not sure if this is because my cake pans have a pretty wide lip on them, an error on my part, or an error in the plans. I do know that if I make something similar again I will be dry fitting the back and finding the through-hole location from that fit instead of relying on the project number.
Wait, ukulele tuning is not constantly increasing in pitch? mind=blown.

This little gap bugs the crap out of me – those through-holes were in exactly the wrong spot. Also, now I have to take the back off to change the strings.

I think it looks pretty good

Although I do wish I actually knew how to play ukulele now…
Tuning / Playing
The initial tuning experience wasn’t so much frustrating as it was keystone-cops-ish. First, I knew that a ukulele wouldn’t have the same tuning as a guitar of course, but I was genuinely stunned that the pitch of the strings didn’t constantly ascend (or descend, take your pick). Having the lowest pitch in the middle of the strings was… odd.
I got a guitar tuner to do the initial tune and found I couldn’t even find the right octave. I thought it would be obvious based on string tension, but it wasn’t, I was still an octave below. I ended up looking up the octave, then playing it on the piano in Garage Band to get in the right ballpark.
Another problem I had at this stage was with the tuners not being secure enough. I hadn’t wanted to over-tighten them, but it turns out that’s sort of the entire point of friction tuners. My tuners were slipping almost as soon as I let go of the peg but I wasn’t noticing because I wasn’t looking at them. A quick turn of the screw driver and they got harder to tune, but also kept their position when I was done with them.
At this point it became clear the strings would keep stretching for a while so I set the thing in the garage for a couple of days and ignored it. When I picked it back up, the strings stayed in tune and I’ve been really happy with the sound!
Project Thoughts
My single biggest takeaway from this project has been that I really need to spend some money on a small drill press. I’ve wanted on for a while, but I spend a lot of time weighing the value I think I will get from a tool against how much space it will take up. A drill press has never been on the positive side of that assessment for me before but this project has pushed me over the edge. The worry about verticality for the tuners, the “sink to a specific depth but not all the way through” aspect of the tuners, and the aesthetics of the triangular layout of the neck-to-brace screws all suffered on this project and would have greatly benefitted from the control of a drill press. I’m not sure when, or even if, I’ll get one, but it was my biggest “want” from this project
I’m still confused by the call for a 2″ screw to secure a 2″-thick item. To me it looks like an obvious bug, but someone mentioned it in the comments on the project page and it seemed to get brushed off as an implementation issue, not a documentation issue, so I’m confused about that.
Next time:
– Find the spacing for the string through-holes by dry-fitting the rear pan, not just trusting the project measurements.
– When working on neck, first mark the fret locations, then shape the neck, then glue the frets on.
Overall this project took just over a month to complete, with maybe 6 nights of real work and a few additional times for quick things like adding another coat of poly.
5/14/2013 – Decided to do project and ordered parts from Elderly and Amazon
5/19/2013 – Actual work started (first headstock)
6/25/2013 – Final assembly
There were a few lengthy pauses in there (notably a week or so off resulting from the frustration of breaking the first headstock and a pause while trying to figure out the best method for the nut and bridge), but most of the time was taken up just by natural pauses as real life got in the way.
This was a really fun project. It leveraged existing skills, gave me a taste of some new skills (wood shaping, especially), and was fairly kind to a creator with a busy schedule. And above all I ended up with a very playable musical instrument for around $30.
John,
Great job on your build! and a great walk-through on you blog! Your panjolele looks great.
I’m sorry that you had some trouble but I think it worked out great in the end. Hopefully, your experiences will save other people some time and headaches. As far as the cake pan depth and the 2″ inch screw goes, I’ve never had to buy a new cake pan and all the used ones I find are 1 1/2″ inches deep. Someday , I should be able to edit the instructions here and I’ll change the screw dimension to read : “1/2″ longer than your 9″ cake pan is deep.”
Your new pans also flare out more than my old ones and the rim of the pan is just before the string exit holes on the back of the brace. Sorry for that too, but here are a few suggestions for ways you can fix your version: 1)You can plug the old holes with round toothpicks and drill new holes 1/4″ further down.2) You can countersink the existing holes so the knot sits beneath the surface. 3)The brace is probably the easiest part to remake, so you could make a new one 1/2″ longer with the holes further along, as you suggest above. If you decide to leave it, don’t worry, it won’t really affect the sound and you won’t need to change the strings very often. Even on my daily player, I only change my strings twice a year.
Re: other little things in your blog post:
I like to clean the pencil lines off my pans with a kitchen scrubby and dish soap. Sometimes I use an abrasive cleaner like Barkeepers friend when I need to get marker lines off.
You do need to put the frets on before shaping the back because if you round the back a little more than you did, the clamps will have less flat surface area on the back and will continually slip off. As far as clamping the neck for shaping, I don’t use any spacers. I just clamp it down from one end only with most of the neck hanging off into space. I brace the loose end against my body and carve away. Flip occasionally to keep things even.
I hope that you’re having a great time playing your uke!
Chester
Thanks for your reply Chester! I will definitely try your suggestions for removing the pencil marks.
Great point on the timing of placing the frets vs. shaping the neck. I agree now that the frets do need to go first. They weren’t a huge impediment to shaping with the risers, so I’ll either do that again next time or use your method of clamping one end and bracing the other with my body.
I could probably “fix” some of the problems with the ukulele I made (more rounding on the neck, moving the through-holes, etc) but I’m not going to. I’m really, really proud of it and I want to keep it as the first instrument I made, warts and all. I’ll fix those issues on the next one I make =).
Thanks again to you and to Make for this guide, I really, really enjoyed the project!
Great project and instructions. Did you have a template for the fret widths on the fretboard? How are the strings tied to the tail piece? Does the panhead screw require a nut to hold the two pans together? Why not glue the saddle to the pan?
Thanks Lynn!
1. Template – there was a table of measurements for laying out the fretboard in the paper issue of Make magazine I was using when making the project. The same table would be available in the digital copy of the issue, and it’s also available as one of the images in step 7 of the online version at http://makezine.com/projects/make-33/panjolele/ (can’t figure out how to direct link to step 7, sorry).
2. The strings aren’t tied to the tailpiece, they’re just knotted, and the knots themselves prevent the string from being pulled through the hole.
3. I was confused by the pan screw’s role also, right up through final assembly. It’s obvious once you do it, but not obvious from the instructions. The front pan is not connected to the body or the neck or the back pan, it’s simple held in place by the tension of the strings against the bridge pushing the pan against the neck/body. In other words, the front pan can (and does) stay in place even if the back pan and the pan screw are removed entirely. The screw only hold the back pan against the neck/body.
4. I didn’t see any reason to glue the bridge to the pan. The tension of the strings holds the bridge firmly in place while giving you the freedom to adjust the bridge if needed. If anything, I fear adding glue to the equation would mess up the contact between the bridge and the resonator and it wouldn’t sound as good.
Hi John,
Great blog and also thanks to Chester for clarifying some aspects of the original build. I started looking for 2″ pans until I read that the original used 1.5″ ones – I was also wondering how the heck 2″ screws were going to be any use with a 2″ pan.