A few times a year my wife asks me to build a canvas for her. This is usually a certain size of paneling cut down, or possibly some joined dimensional lumber. Then she paints whatever is on her mind on it. I usually don’t post these because they don’t have a lot to do with the end result, but recently she asked me for a fairly involved “canvas” to make a “barn quilt” on. She sent me a link to this page as a reference for what she had in mind. These aren’t really barn quilts in the traditional sense, but certainly the designs and materials are inspired by them.
Cuts
After spending some time discussing our options, we decided to cut down scrap lumber and artificially age it instead of trying to find reasonably sized, already aged lumber. The finished piece was to be 3 feet square, so I decided to rip lots of relatively thin strips from 2-by lumber to get lots of 1.5″ wide strips. I don’t think I ripped them to a specific width, I think I just set the guide on my table saw to a reasonable size and started ripping. They’re probably about 1/4″ to 3/8″ thick. Each finished piece was nominally 9″ by 1.5″, though I used lots of different types of lumber and there was some natural (and encouraged by the artist) variation in the individual pieces.
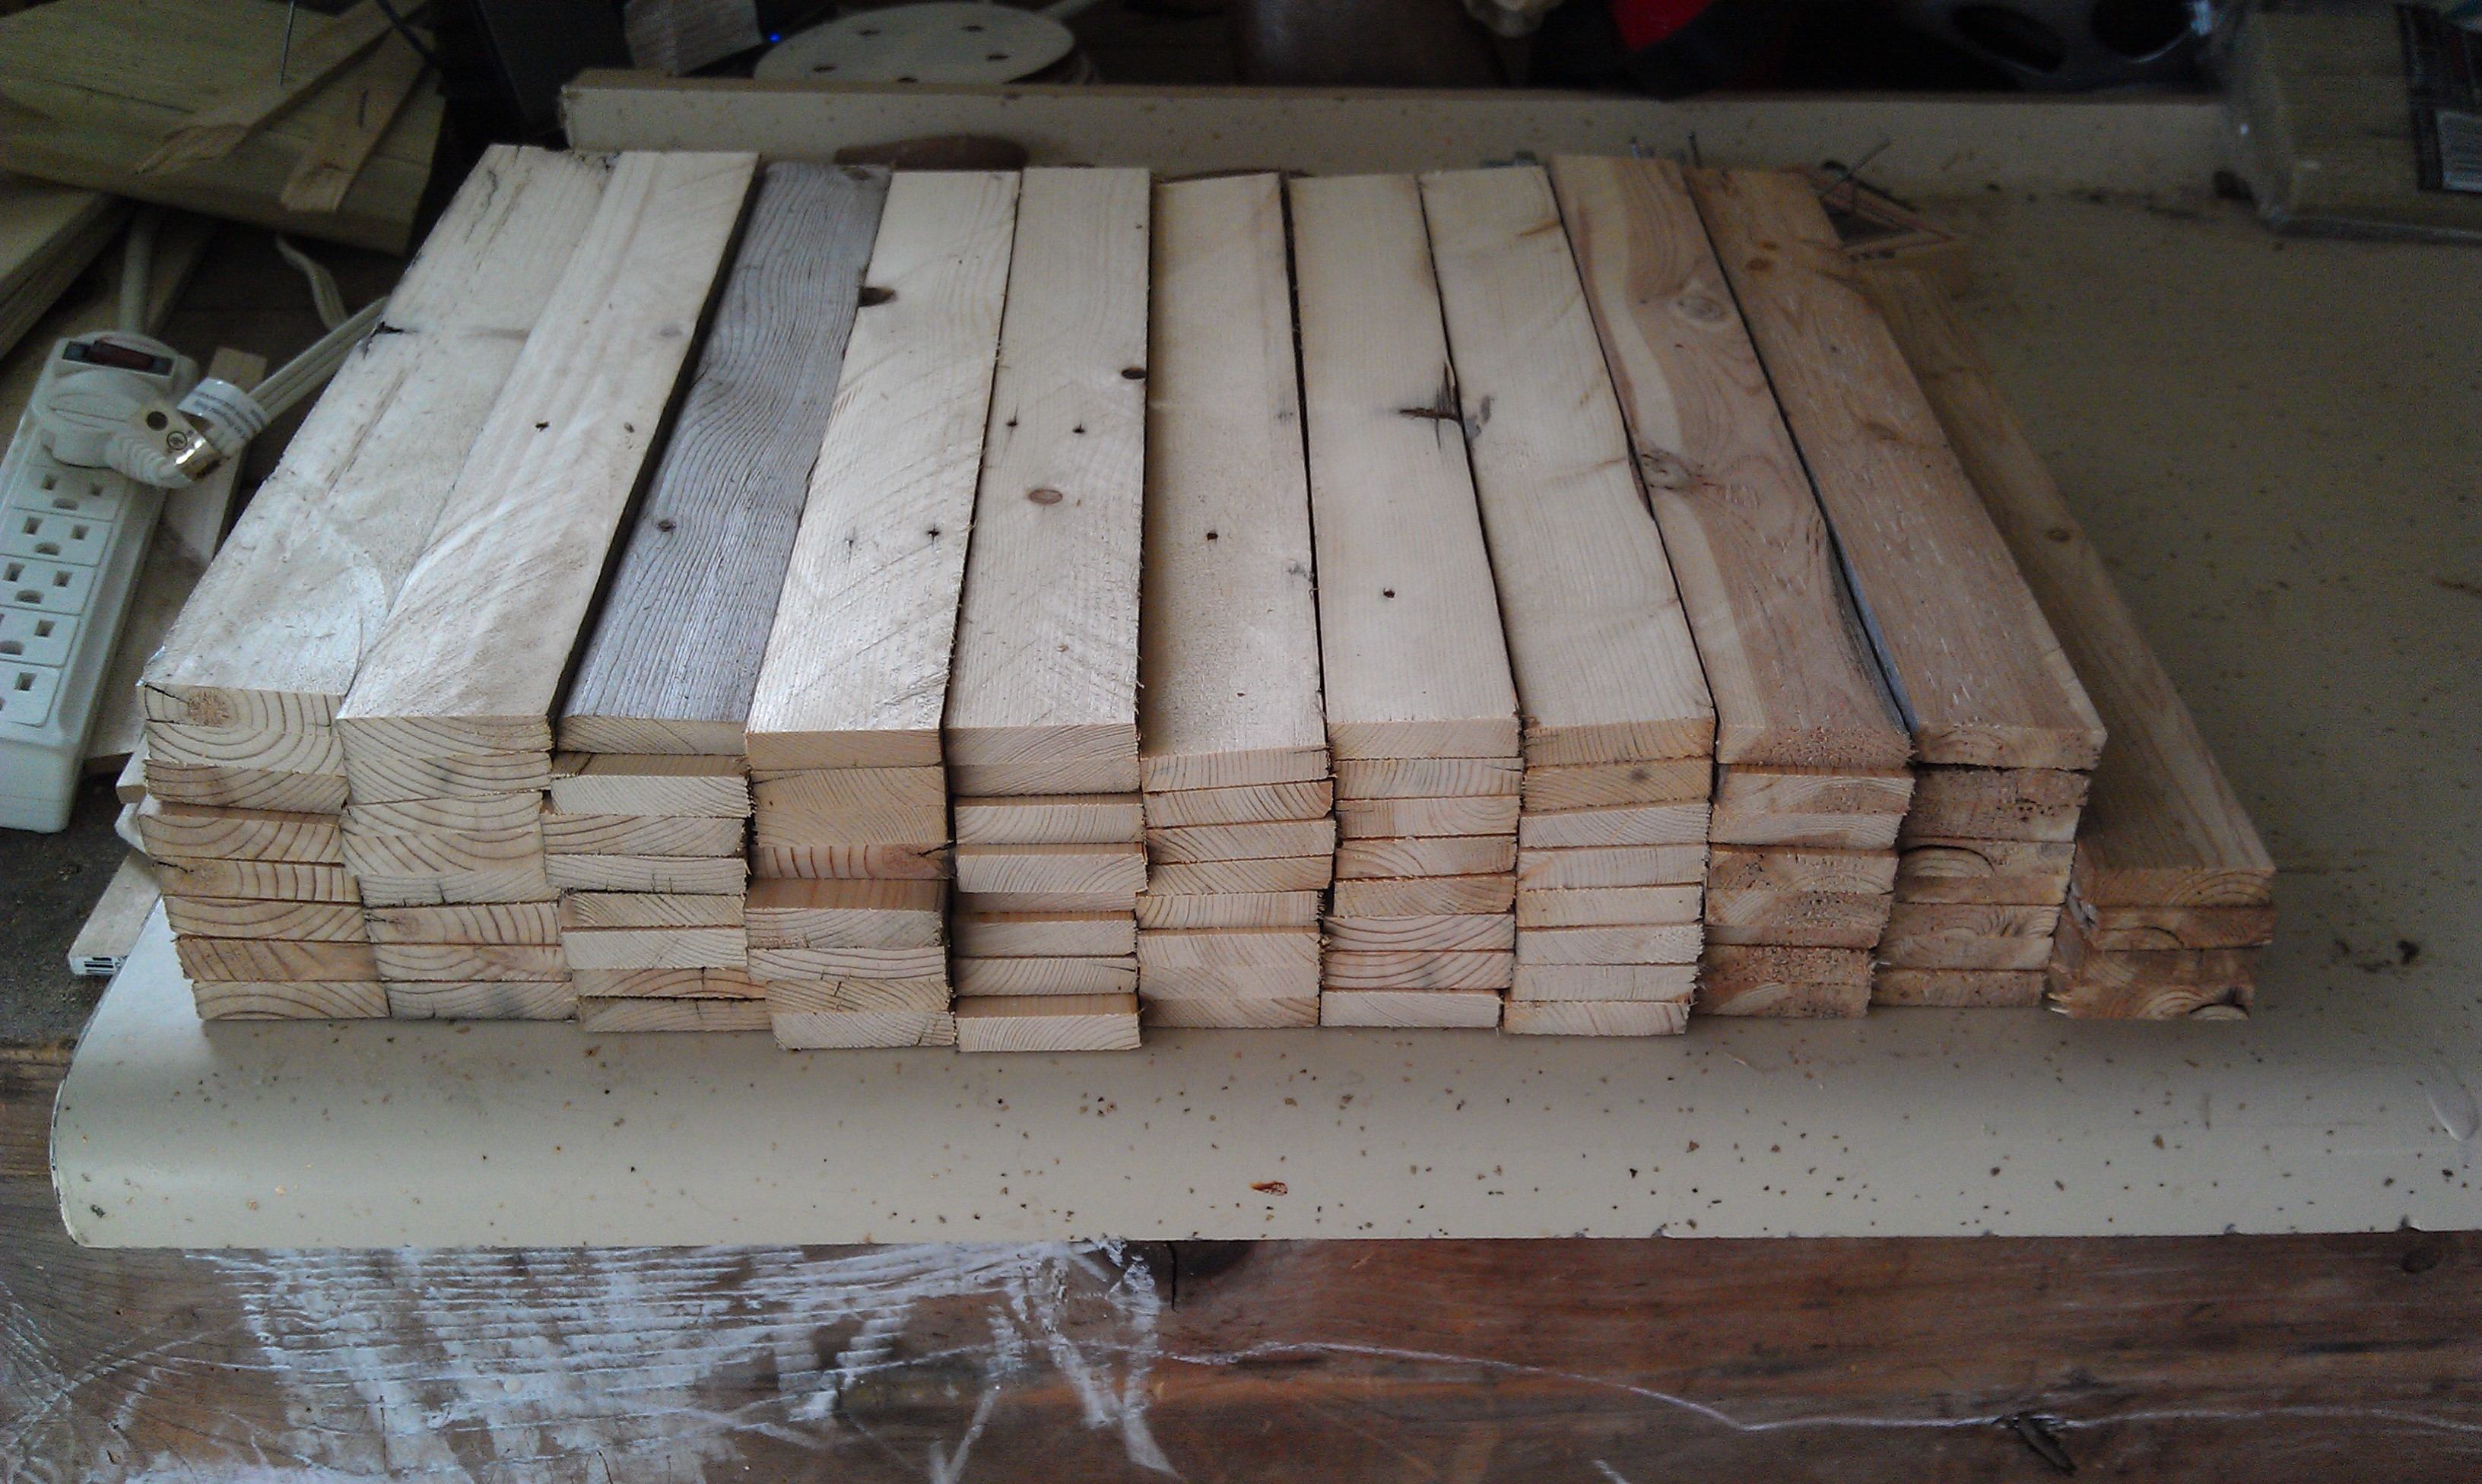
It’s worth noting that I somehow got confused and thought it was a 3×3 grid, not a 4×4 grid, so I needed to cut all these down from 12″ to 9″, and also to cut another 24 pieces. Oops.
Aging
I wish I knew more about the process, but my wife applied some sort of solution to the freshly cut wood to artificially age it. I believe it was made by soaking steel wool in vinegar for a day or two, then applying the solution and letting sit for a day. Seems kooky but it worked pretty well.
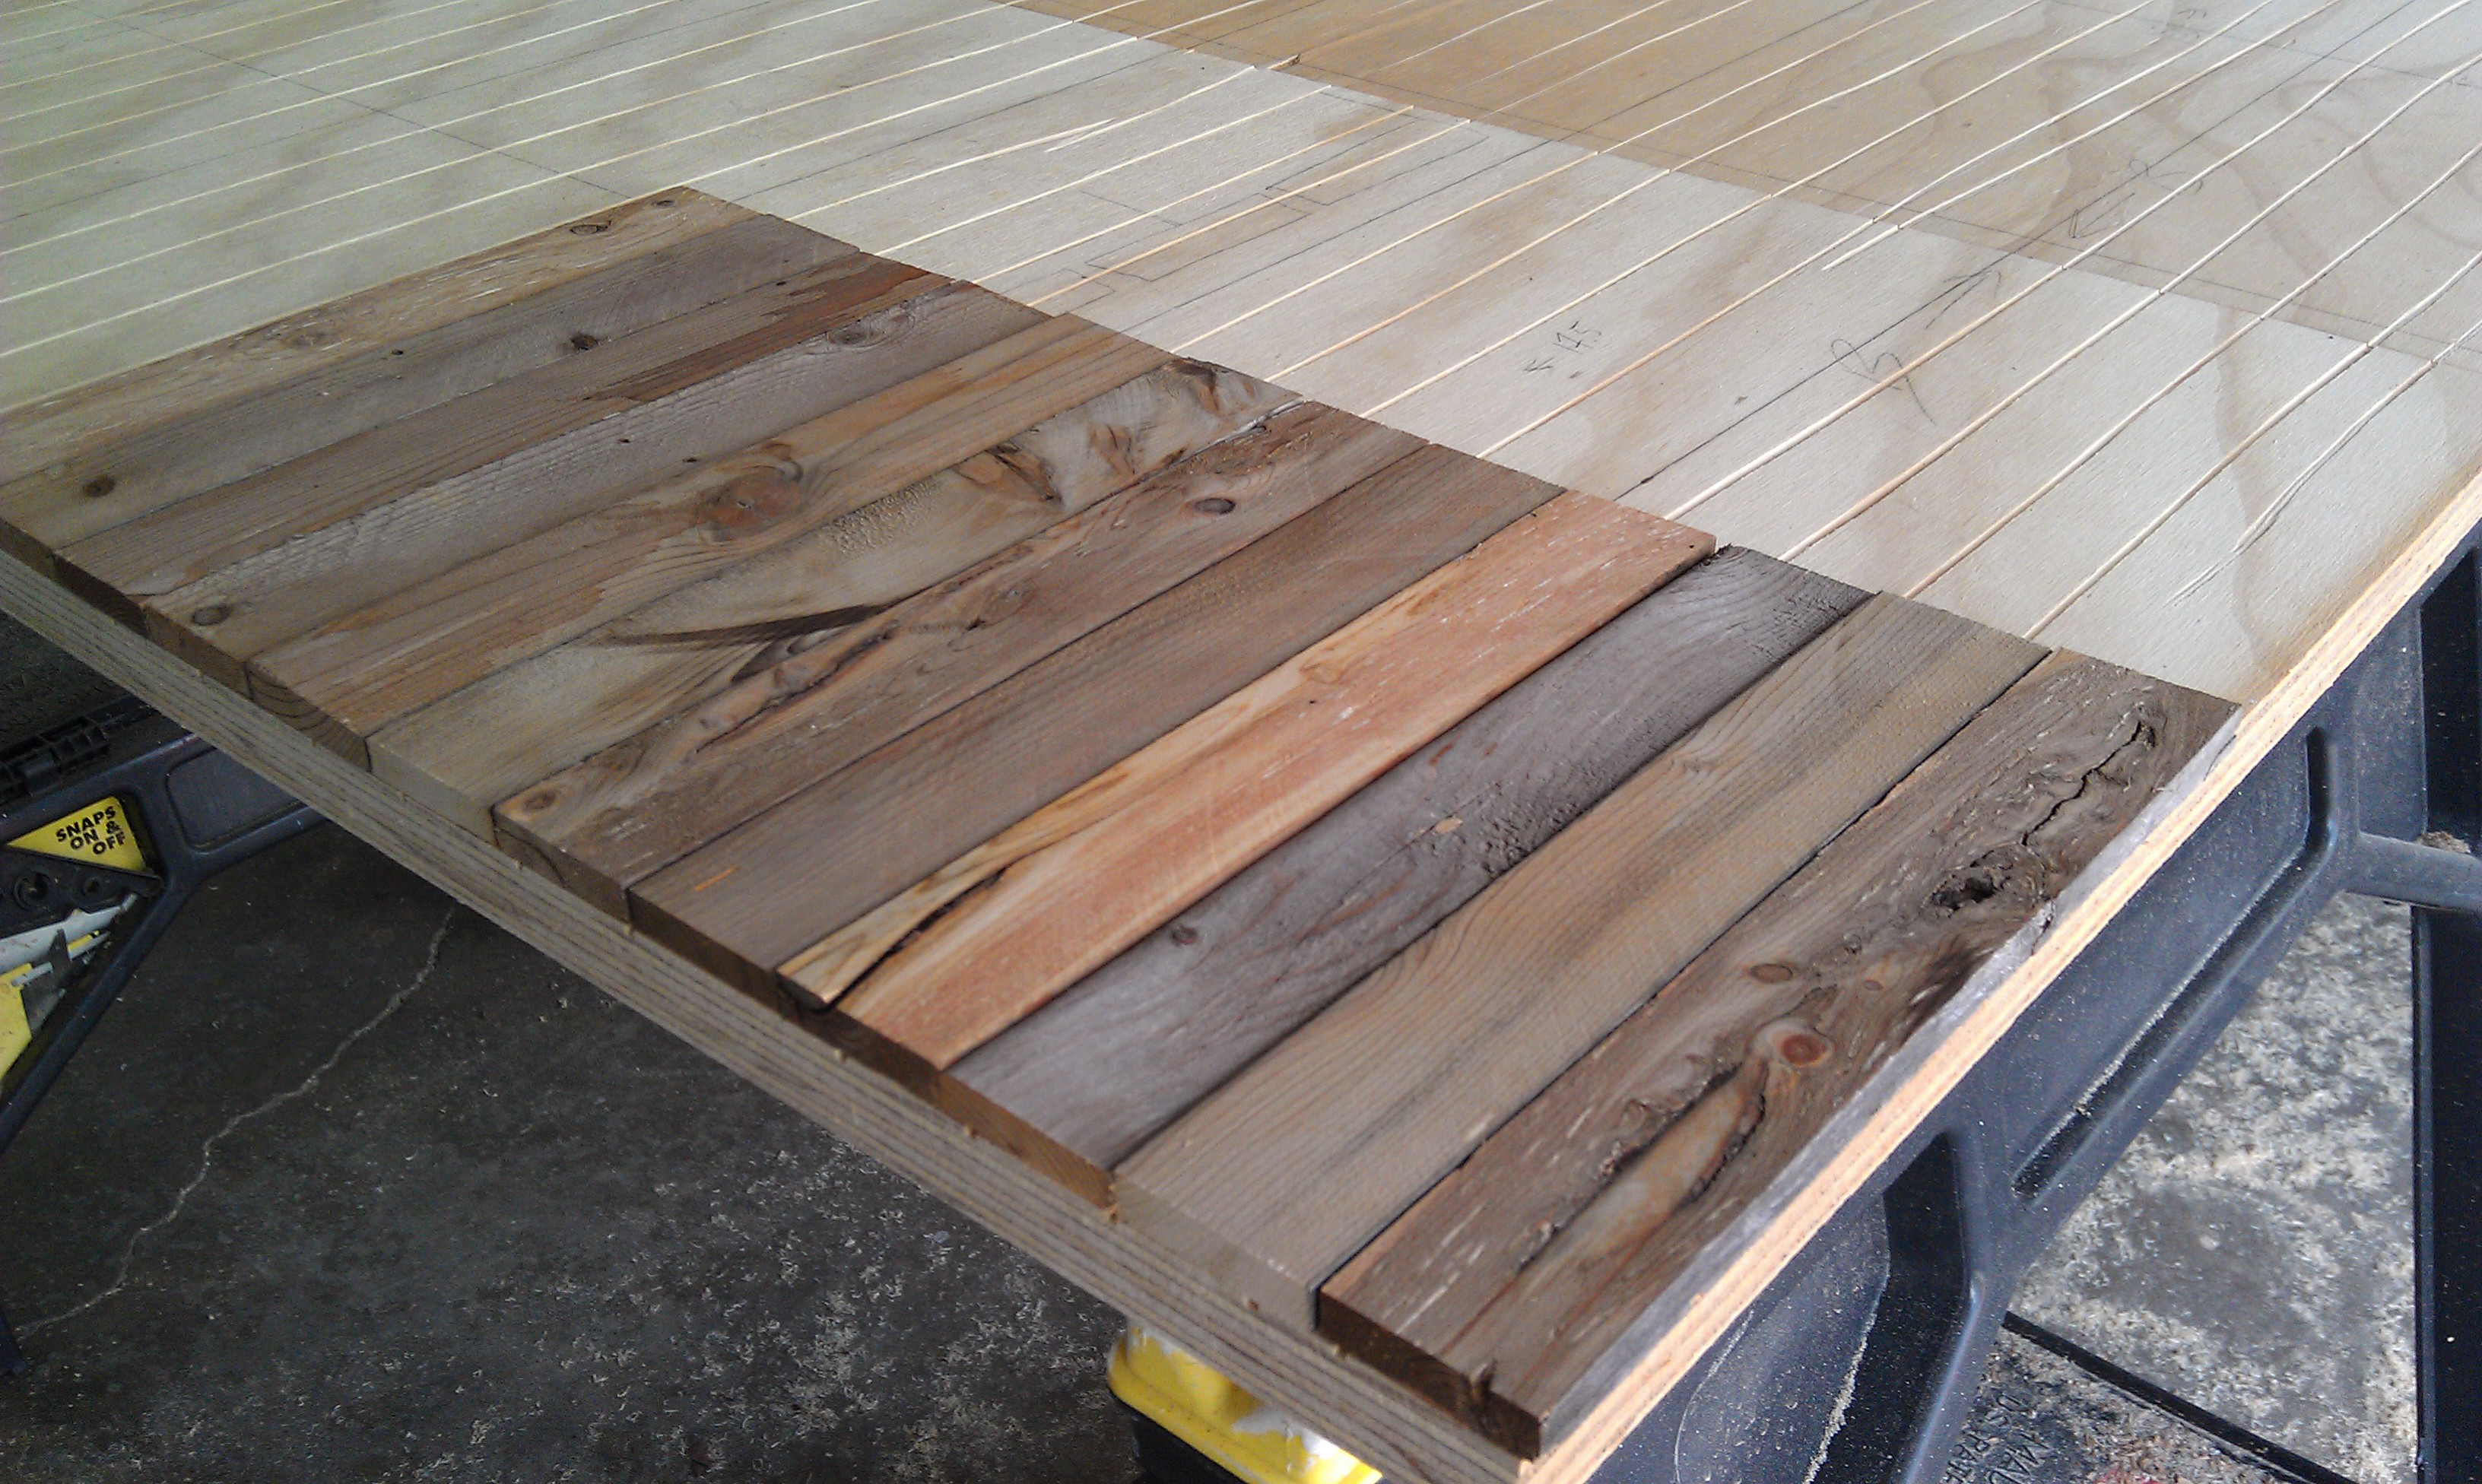
Compare these pieces with the freshly cut pieces above. Much nicer.
Placing / Gluing
This piece is going to live outside and I was very worried about warping causing any of the pieces to shift or pop off. To help combat this I used overkill in selecting 3/4″ plywood as the backer. I also scored the backer and the backs of each piece with a saw to give a more interesting surface for the glue to adhere to.
The backer is cut to roughly 35″ by 35.5″, with the idea that the piece would be flush with the bottom and stick out .5″ on the sides and the top (with the goal being that the weight of the piece is borne by the backer at the bottom, but that the backer isn’t visible around the top and side from the front).
I performed the gluing, but my wife had gone through and done a dry layout of all the pieces before hand, exchanging, rotating, whatever, until she had the pieces arranged the way she wanted them. Then she numbered the back of them as she picked them back up. This allowed me to move quickly while gluing without worrying about the overall aesthetics.
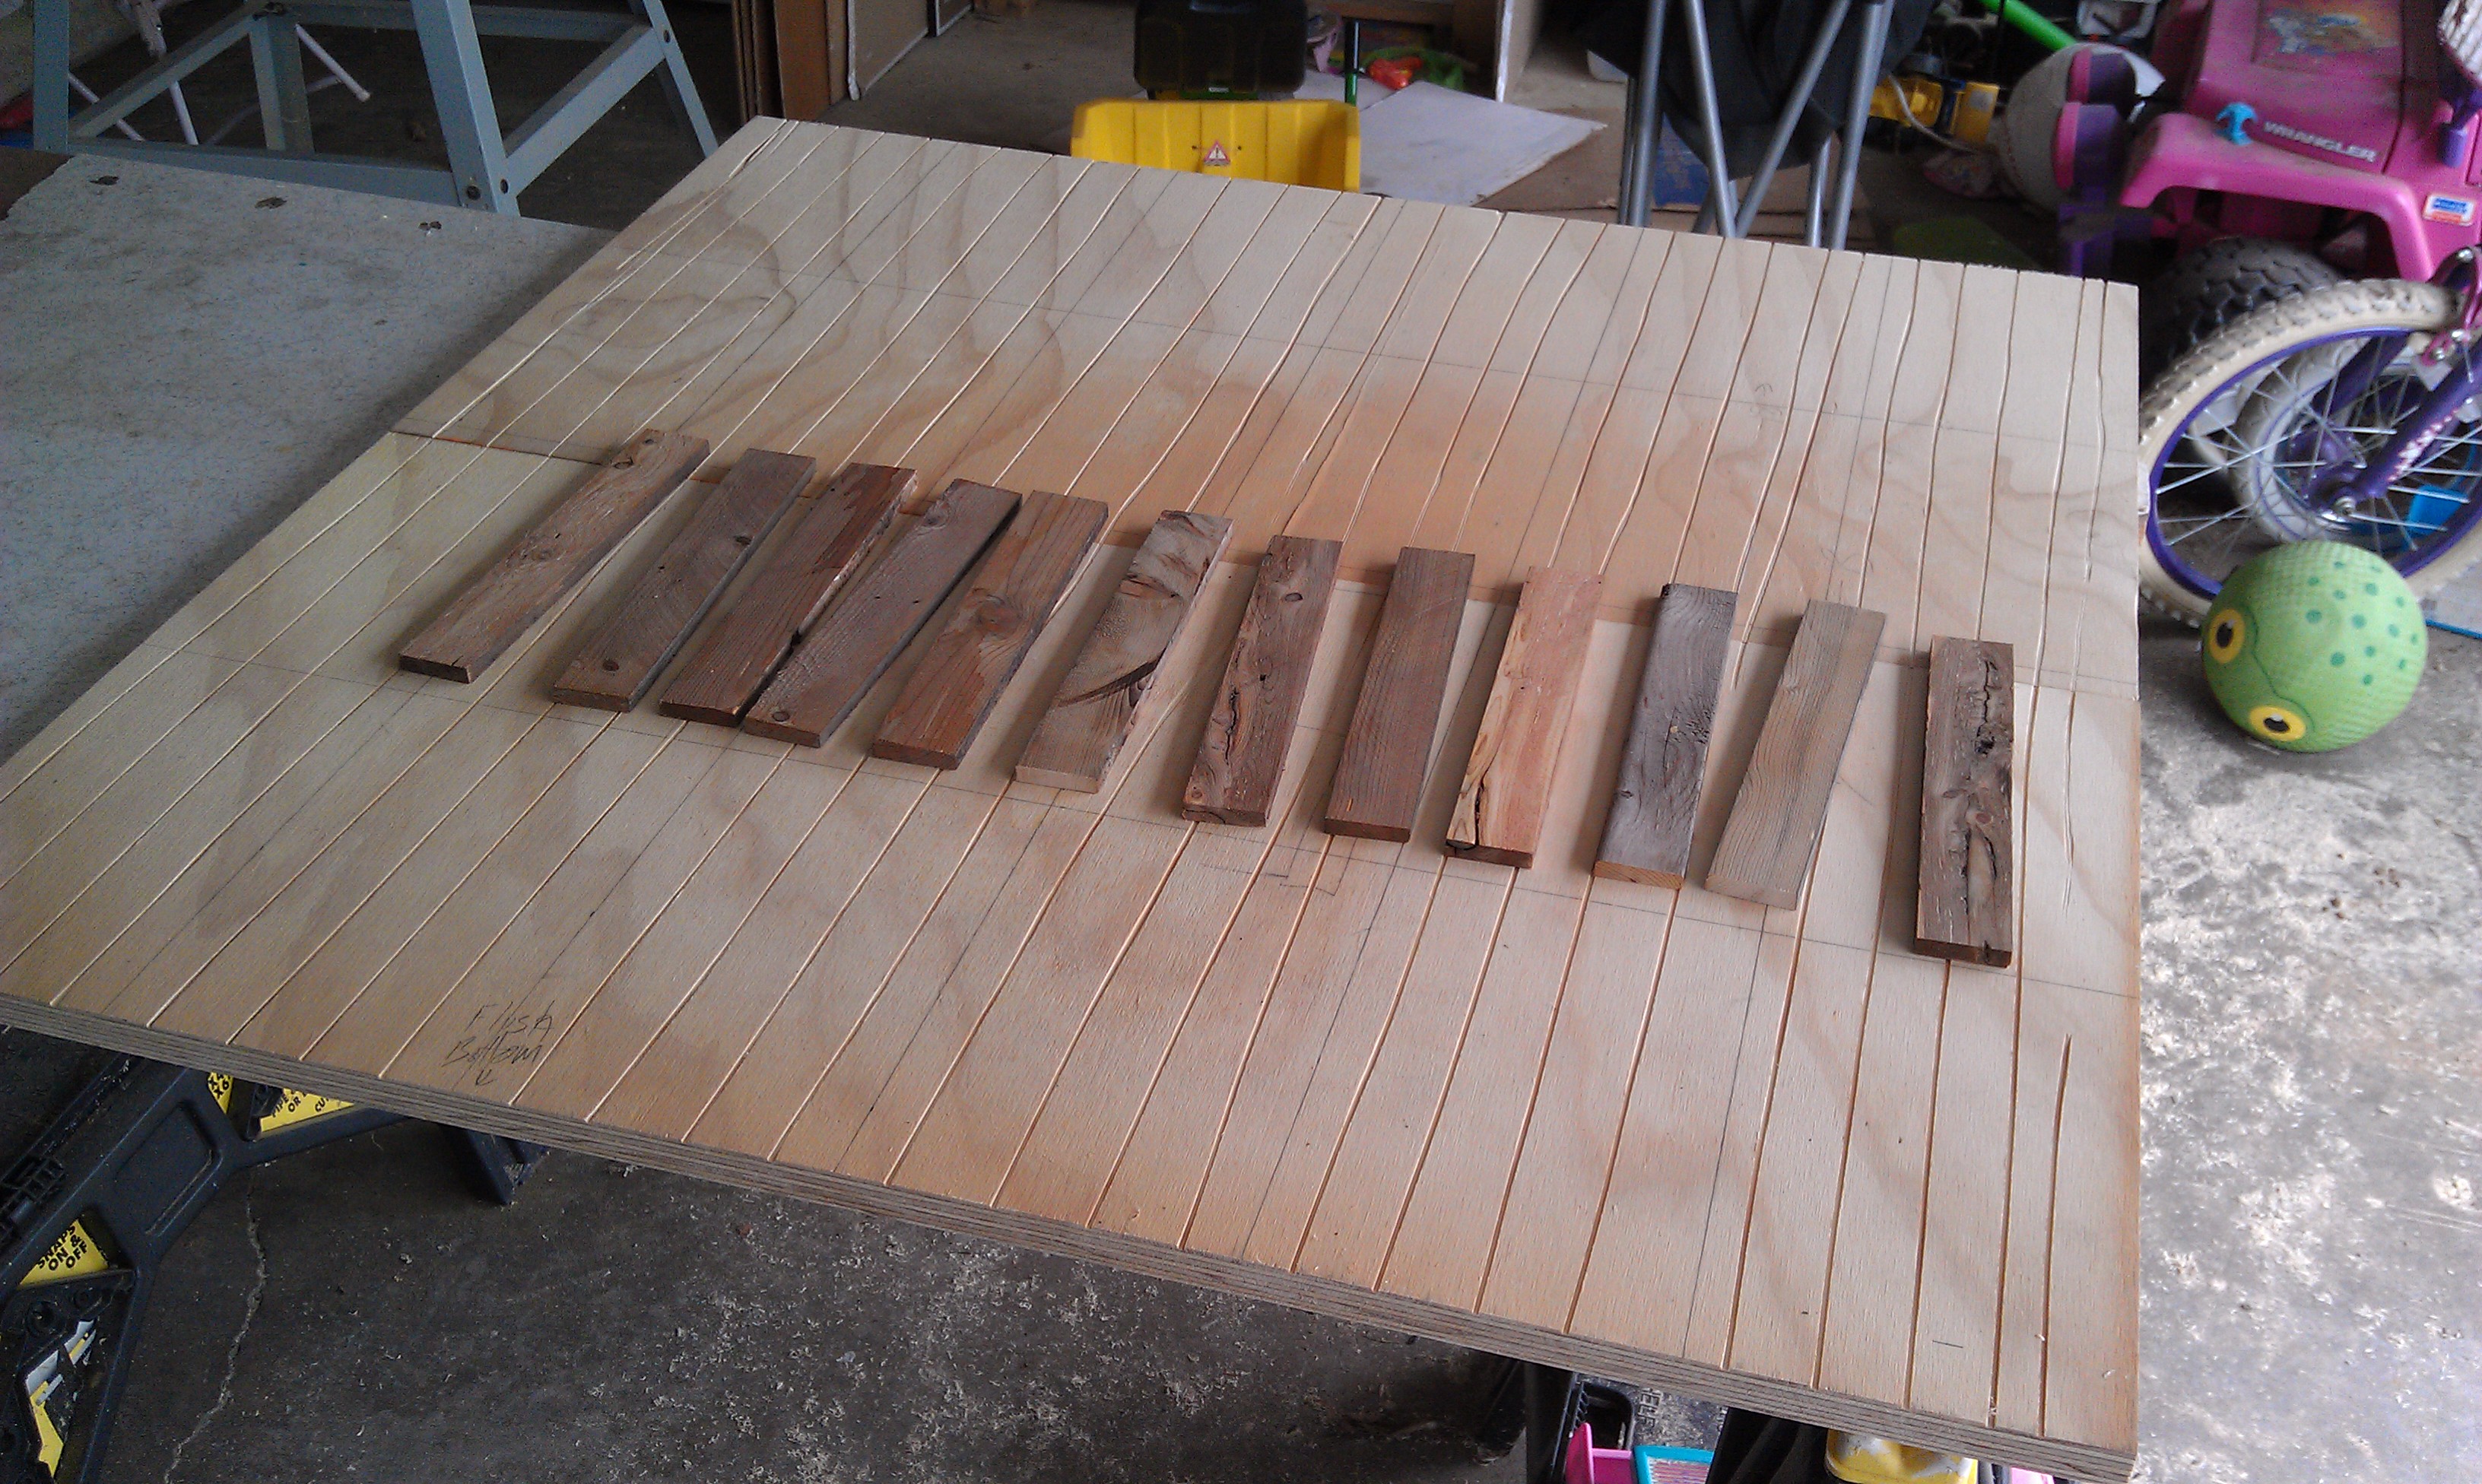
A rough picture of what the backer board looked like. I drew pencil lines to get a rough idea of where the pieces should be lined up, though this wasn’t always strictly adhered to while placing.

Numbers on the pieces from a previous dry layout made gluing much simpler. Never had to race against glue drying while considering overall aesthetics.

All the pieces glued. Seems like a lot of work for a glorified canvas, but I’m oddly happy with it.
Paint / Finish
I can’t take credit for anything else that happened, but I do think the piece turned out really well. It currently sits on our front porch and makes me smile every time I see it.

“Canvas” started 4/13/2013, finished 4/20/2013. Time included ripping lengths of 2-by material, cutting material into 12″ lengths, then doing all of that again into 9″ lengths. Aging the pieces, dry-fitting and numbering pieces, cutting down and scoring the backer, scoring the individual pieces, gluing, and drying.